 |
| Classic Performance Products |
| Installing Tapered Wheel Bearings |
| By Rob Fortier |
|
|
I can remember the first time I disassembled the crank hub
on my Schwinn Stingray for no apparent reason other than because I could
and was introduced to caged ball bearings...or better yet, my garage
floor quickly becoming acquainted with numerous bearings rolling in every
direction! (I won't even get into
the intricacies of the New Departure rear hubs!) From then on, I gave more
respect to the reciprocating load-carrying devices each time I found myself
dealing with them. My '55 Stepside brought back fond memories of my experimental
youth, except this time around, I wanted to take advantage of a modem alternative-tapered
roller bearings. |
While ball bearings serve their purpose to effectively carry
loads and prevent friction, they don't take as kindly to today's modem road
conditions as tapered sealed bearings do. The newer style bearings can handle
much more side load, which is very critical, especially with radial tires,
and can deal with things like rain grooves, something that has proven detrimental
to ball bearings. With this in mind, many companies have produced conversion
kits to upgrade your front wheel bearings, and Classic Performance Products
offers one of the most convenient upgrades out there. |
Their newly designed kit consists of high-quality inner and
outer roller bearings, races, and rear seals. And for well under $200, it's
quite a deal for the benefits gained-better handling with longer wear life.
After rebuilding everything else in the frontend (see CLASSIC TRUCKS August
2001), it was very apparent that the wheel bearings had lived out their
lives on the '55. Follow along as I give new life to my
reciprocating rollers and install CPP's tapered bearing conversion kit.
You, too, may want to become a modem bearing convert! |
 |
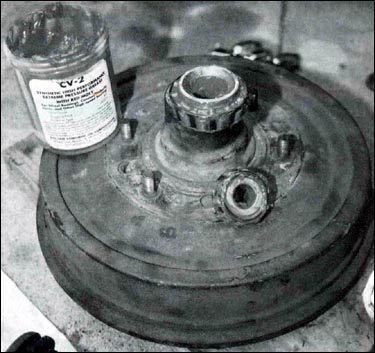
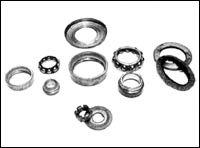
| The Classic Performance Products roller bearing conversion
kit consists of both inner and outer roller bearings and races, as well
as the rear dust/retainer seal. The axle nut and washer are also from CPP,
while the synthetic grease is Red Line's CV-2 high-performance extreme pressure
bearing grease-perfect for this job. (For more info on Red Line synthetic
oils and lubricants, call 707-745-6100.) |
|
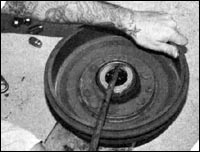 |
| After the drum and hub are removed as one (at which time the
front caged ball bearings and the inner race should fall loose), the rear
retainer seal needs to be pried out. I found that removing the felt ring
first allows the retainer to come out much easier. |
|
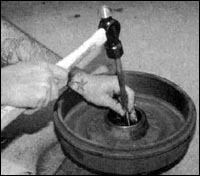 |
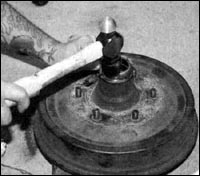
| A medium punch was used to (carefully) work the old races
out. In this case, each race came out with ease; others may experience more
difficulty removing them. Beneath the hub I placed a small piece of tubing
with an inner diameter large enough to allow the race to come out without
interference. |
|
 |
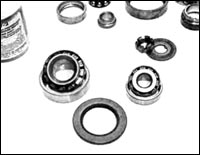
| Once all the bearings and related parts were divorced from
the hubs, I found that somewhere along the line someone had swapped certain
bearings without changing the races, which could explain premature wear
and excess slop. The outer left-side bearings actually had a plastic cage
while all the others, varying in brands, were metal-caged. |
|
 |
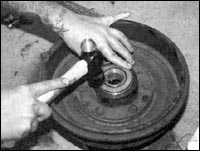
| The job remained easy from here on out. The races were lined
up in the hub, then started with a hammer by tapping around the perimeter
until about halfway in. The old races were used to finish driving them into
place. |
|
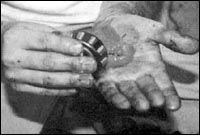 |
| Now the fun part, getting greasy! While II was offered the
use of a grease-packing tool, I prefer the old-fashioned way and getting
my hands dirty. Plus, the Red Line synthetic doesn't make as much of a mess,
but a roll of paper towels was kept nearby nevertheless. |
|
 |
| With the rear bearings all lubed up and packed with even more
grease in the race, the rear retainer cover is carefully tapped in. CPP
recommends using Loctite 640 "green" sleeve retainer to provide
a secure adhesion of the seal. |
|
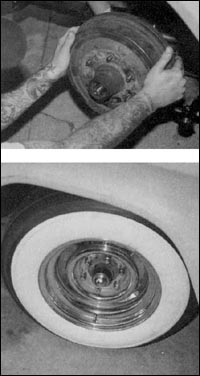 |
| The tapered bearings slid onto the spindle nice and snug like,
which told me I was in for a better ride as soon as I tightened-up the axle
nut, slipped a cotter pin in place, then knocked the dust cover on. I will
admit that I did experience quite a vibration after the initial road test,
but come to find out, all four of my "shiny" chrome wheels were
badly bent. Needless to say, the stock wheels were dug up, painted, and
put back into service. Now, I've got a smoother ride than I ever expected. |
|
|
|

