| Classic Performance Products |
| Chevy II Dropped Spindles and Disc Brakes |
| By Scott Parkhurst |
|
|
|
|
While we were over at Classic Performance talking to
the head honcho (Jim Ries) about modifications possible on these early Novas.
The guys told us about their dropped spindle/disc brake upgrade kit that
offers improved handling and stopping. We asked a lot of the same ques-
tions you would, like how tough is it to install, are any special tools
required, and how complete is the kit? The answers we got were all the ones
we wanted to hear, so we decided maybe showing all of you another Nova front
suspension option might not be a bad idea. This combination of custom parts
and fresh rebuilt components will surely improve ride quality, and the 2-inch
dropped stance will slide the front wheel/tire assembly up into the wheelwell
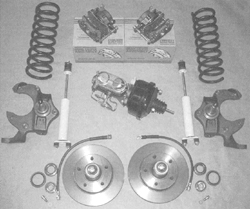
where it belongs. The kit is based on a Superior Spindle, and the subsequent
components are all available from Classic Performance. Other options, like
sway bars and trick coil springs, can also be had from Classic, but we kept
our tricks to a minimum, only opting for the cool drilled rotors, the braided
stainless lines, and the booster/ dual master cylinder/proportioning valve.
These modern components will bring the performance of any Nova up to modern
standards, without having to remove the entire clip. It's about as much
as you can improve the existing suspension design, and all of these mods
would be legal in racing classes specifying "stock" suspension
systems.
We started by removing the existing spindle and drum brake setup. |
Next we removed the driver's side spindle, inspection of the
upper control arm showed severely worn bushings, and a crack from the lower
ball joint to the outer edge of the arm. A rebuilt control arm was necessary,
and Classic Performance stocked the parts to make it happen. With the new
arm in place, we continued with the spindle installation. Getting the new
spindle in where the old one used to be was simple. The Superior Spindle
was indeed a direct bolt-in for the stocker. The calipers and rotors were
all a basic bolt together operation. The rotors shipped with the Superior
Spindles are of fine quality, but we really wanted the drilled units for
improved cooling. We also replaced the tired factory coil springs with stock
replacement units, and have polyurethane bushings to upgrade our rubber
pieces with.
We picked the bins at Classic Performance for fresh tie
rods too. The ends and sleeves on our stock units were there, but well worn.
Stepping up to new front end components is a great time to upgrade your
entire assembly, and while you have it all apart, you can inspect and replace
any worn parts. We sure did, and we'll benefit from knowing all of our parts
are fresh, safe, and capable of the abuse we plan to throw at this car in
the future. With our front end components bolted on (including our new coil
spring and 3-way adjustable shocks), we began to build upon the Superior
Spindle. The bearings were greased, and the rotor slid into place. Once
the rotor was secured, the caliper assembly was mounted, and all clearances
were checked. |
With everything bolted down, we had sufficient clearance
to all existing components (a testament to Superior doing their homework)
and proceeded. We hooked up our braided line, and moved into the engine
compartment to rip into the master cylinder.
The Classic Performance booster/dual master cylinder/
proportioning valve assembly bolts in where the factory single-chamber cylinder
is installed. A dimple in the firewall below the factor') master cylinder
hole acts~ a pilot for the new booster mounting point. With this hole drilled
and the factory studs knocked out (and their holes resized) the Classic
Performance unit bolted right in place. The part comes pre-plumbed from
the master cylinder to the proportioning valve. The lines from the proportioning
valve to the brake cylinders will have to be re-fabricated, but it's not
difficult for anyone who has ever bent lines before.
The custom proportioning valve is also wired for a low
pressure switch. This important safety consideration can be connected to
any two-wire light for in-cockpit notification of a low-pressure situation
(due to a leaking cylinder or any other loss of fluid). Most production
cars had a provision for this after 1967, but older cars can add a dash
light. It is considerations like this that separate Classic Performance
parts from others. All hardware is included, and all parts are warranted
for life. Once we get this Nova down, we'll be ready to boogie. We've got
a great start. |
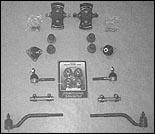 |
In addition to the trick spindle swap, we decided to step
up and replace our worn components with these fresh pieces. Fresh ball joints,
hardware, tie rods, bushings, and shock tower brackets will help us sleep
at night, and hard launches at the strip won't
be as scary. |
|
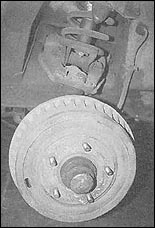 |
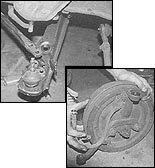
| Once we yanked the wheels, here's what we saw. Stock, gross
drums and tired components made for a spooky ride and freaky clunking noises
while braking. We were definitely ready to improve upon these tired parts. |
|
 |
| We began by removing the shocks and relieving pressure from
the suspension. |
|
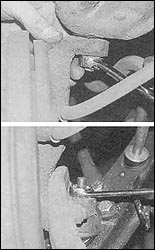 |
| The upper and lower ball joints were unbolted to facilitate
removal of the spindles. |
|
 |
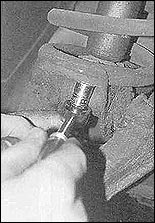
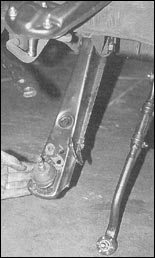
| These lower radius rods must also be removed. There are two
bolts per side, and you're done. |
|
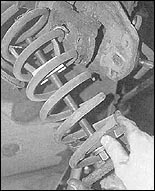 |
| The coil springs must be compressed for removal. There is
not much room to maneuver; but this cool tool from Snap-on works fine. Common
hand tools got this one out for us. |
|
 |
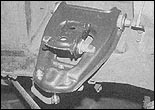
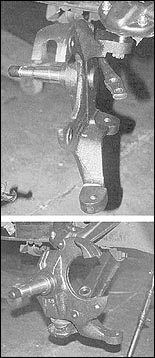
| With the spindle removed, here's what you see. The entire
spindle and brake assembly comes off in one, piece, and the balljoints and
control arm are left hanging in the breeze. Nova suspension components are
easily replaced at this point. |
|
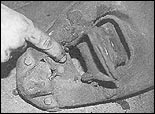 |
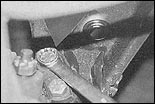
| Our control arm bushings were completely shot, and if you
look carefully you can see a gnarly crack from the ball joint mount to the
edge of the arm. This explains a lot of the ill-handling we experienced
with the car and all those creepy noises. |
|
 |
| This rebuilt control arm (with fresh bushings, ball joint,
and hardware) will serve us well. If you plan on modifying an early Nova
front suspension, plan on getting a set of these, too. |
|
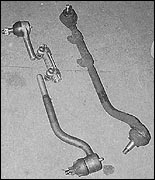 |
| Fresh tie rod ends and sleeves were also added to our little
Deuce. A new idler arm and steering arm had already been installed in a
vain attempt to aid this particular car. They were inspected for damage,
and we reused them. |
|
 |
| With our new and rebuilt components in place, we were ready
to begin installation of the Superior Spindle. |
|
 |
| The new spindle bolted in directly. No modifications were
necessary to make it fit. It's a fine piece of engineering. |
|
 |
| With the new tie rod hooked up and all the ball joints snugged,
we were ready to install the rotors and calipers. |
|
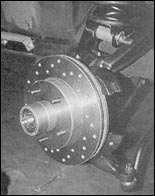 |
| The rotors that come with the kit are solid, but we wanted
to step up to these drilled pieces (available through Classic Performance). |
|
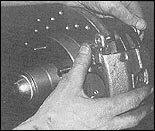 |
| The calipers and pads were also a perfect fit, and we added
a stainless brake line too, also available from Classic Performance. |
|
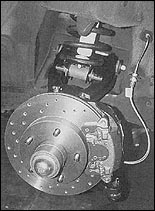 |
| What do you think? Are we ready for some action? |
|
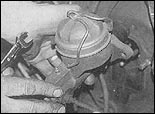 |
| Okay, maybe we're ready in the wheelwells, but not at the
firewall. The stock single chamber reservoir just won't cut it anymore. |
|
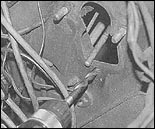 |
| A factory dimple at the base of the hole in the firewall serves
as a pilot point for the new hole. The existing studs were punched out,
and those holes got resized too. |
|
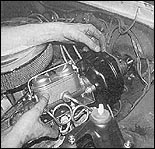 |
| With the minor firewall mods complete, we were ready to bolt
in the Classic Performance booster/master cylinder/ proportioning valve
assembly. It slipped into place easily, and hooks up to the factoty brake
pedal. |
|
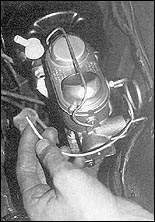 |
| Now we have power disc brakes in our Nova. This wire is for
the low pressure light we discussed in the text. Now our Chevy II is ready
for the streets with a modern suspension and brake upgrade. Classic Performance
does lots of these kits for many different types of cars. With the help
of Classic Performance, we're ready to hit the strip or the burger joint.
Who's buyin'? |
|
 |
| It's always best to have shop and assembly manuals on hand
to make sure your installation is correct and to make the project as easy
as possible. We recommend factory manuals, available at Greg's
Automotive |
|
|
|

