Classic Performance Products 175 East Freedom Avenue Anaheim, CA 92801
 

   Classic Performance Products Installs Hidden Tailgate Latches 

Classic Truck Parts


For more than 50 years,Chevy trucks were produced with a tailgate that required latch pins to hold it in place. Probably the most successful style was the curved hooks with chains that allowed the gate to be secured upright, or held laterally when opened. As a working 
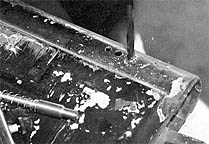
feature, they are great, but on a custom truck, forget it. The stock latching system is bulky, noisy and tends to chip the heck out of a paint job. 
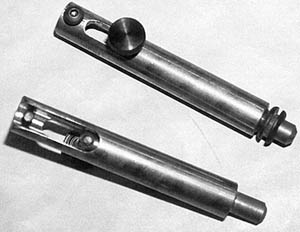
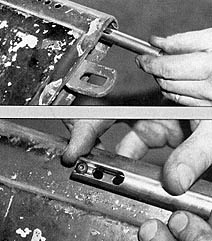
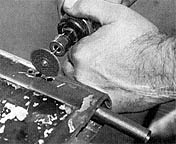
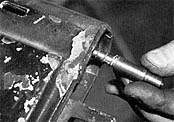
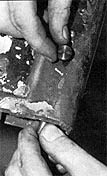
To rectify the situation, the good folks at Classic Performance Products are offering a new form of locking pins that actually mount inside the tailgate, where they are completely out of view and cannot threaten the paint. The spring-loaded locking pin is housed in a 5/8-inch housing that is mounted at both ends 
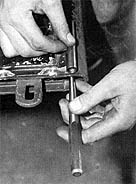
of the round, upper lip of the tailgate. A few small holes are drilled on the inside of the lip for a knob that slides the pins in or out. It's almost impossible to install them incorrectly. 
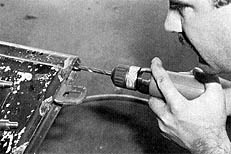
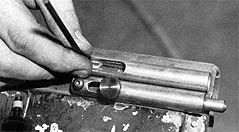
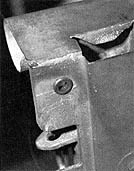
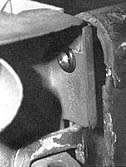
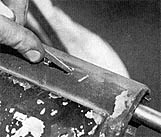
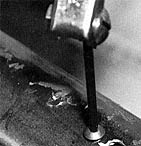
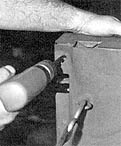
The locking pin itself even features a small, center punch on the end to mark the location of the hole that will be drilled on the bed flange.  With so many classic truck customers opting to delete the original hooks and chains in lieu of a more modern, personal appearance, it only makes sense to check out these new locking pins. For more information, contact Classic Performance Products and follow along as we show you just how easy they are to install. 


The first thing to do is remove the locking pin and spring by removing the plastic knob. Then, position the housing by centering it within the area of the upper tailgate lip. A center punch is then used to mark the center of the pin. 
 
Once the precise location is determined, a pilot hole is drilled with a 1/4-in bit. 
 
The housing measures 5/8-inch in diameter, requiring the use of a 5/8-inch drill bit to create the hole into which the housing will be inserted. 
 
The next step involves marking the holes required for the single mounting screw and the lateral notch for the actuating knob. Precisely locating the holes is critical. 
 
Once the hole positions are determined, the mounting screw hole is drilled with a 3/16-inch bit, while the two other holes, which will be cut out in-between and serve as the slide gap, are drilled with a 1/4-inch bit. 
 
Check the position of the new holes by sliding the housing into the tailgate. Also check the holes by inserting the mounting screw through the housing and into the hole. You can see how the other two holes become the outer edges of the area needed to create the sliding knob gap.


To remove the metal between the holes, use a small cutting wheel and gingerly cut from one hole to the other, as shown. 
 
Since the cuts won't be perfect, a small file is used to remove the extra metal and form a smooth opening free of burrs. 
 
With that complete, install the housing in the tailgate and install the mounting screw to secure it in place. 
 
Reinstall the spring on the locking pin, along with a small amount of lithium grease, and insert it in the housing. 
 
By holding the pin in place, the actuating knob can be installed through the exterior opening. This will hold the Pin in place. 
 
By closing the tailgate and snapping the locking pin a few times, the point of the pin will mark the center for the hole needed for tbe pin to lock into. Drill the hole out with a 7/16-inch bit.
The pins come with rubber grommets that install inside the bed holes to keep the pin from wearing on the bed and rattling on the metal. 
 
With that, close the tailgate by holding in both knobs. When the tailgate is closed, the pins are released and will slide through the bed holes for a secure, tight fit.

© Classic Performance Products Inc.

This "website" and all contents are property of Classic Performance Products Inc. Disclaimer

This page or any other content of the website may NOT be reproduced without our permission.   

 HOME ORDER TECH  BOOKS STEERING BRAKES SUSPENSION POLICIES