Classic Performance Products Installs
A Reverse Tilt Hood For Ford Pickups
|
A lot of F-100 owners have suffered through
the poor hood hinge design of their pickups and decided to eliminate the
problem with a reverse-tilt hood kit. We can't find any reason not to convert
to a hood flip kit, and now Classic Performance Products has
given us yet another reason to make the switch: stainless
steel. The new stainless steel kit looks great under any F-100 hood, and
of course, it makes your hood look outstanding when open, while eliminating
the pathetic original hinges.
|
There's no welding necessary--all you have to do is drill
a few holes. We picked up a kit from Classic Performance Products and installed
it in just a couple of hours. Follow along as we install a stainless
steel reverse-tilt hood kit on a '56 Ford F-100. The
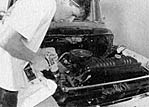
common saying is that the original Ford hood opening system didn't work
all that well when hey were new (46 years ago For a '53 Ford). While a
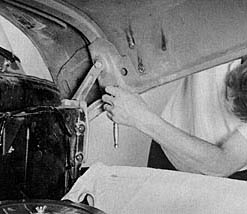
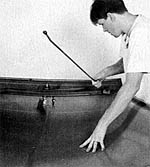
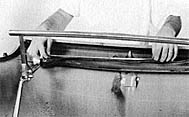
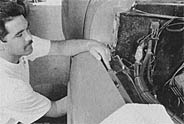
friend supports the hood, take off the hinge. Then, run around to the other
ride and take that one off, too.
|
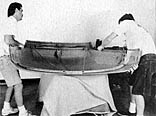
Flip the hood over onto a work surface that will not
cause scratches and is stable. If you drop your hood, you'll do more damage
than you might expect.
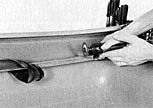
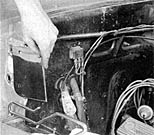
Unbolt the support rods and then wiggle them back and
forth to loosen the plug-welded areas. The paint will usually crack
and reveal the welds.
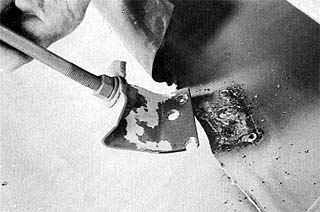
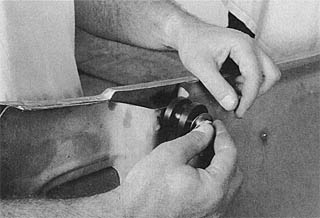
Drill out the welds ta removethe support rods. Be careful
not to let the in too far. Using a depth gauge as a socket or two slipped
over the drill) will help prevent damage.
|
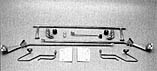
Here's the Classic Performance Products
stainless steel reverse tilt hood kit as it arrives in the mail.
This is high-quality stuff.
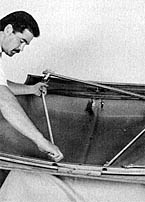
After bolting the underhood framework together,
bolt it to the existing holes with the supplied hardware.
A few simple measurements ensure that the framework is
properly centered on the front edge of the hood.
|

A small portion of the metal lip on the underside of
the hood will need to be trimmed. After the framework is positioned, mark
the area.
A die grinder works best for cutting this lip. If you
don't have a die grinder, you could use a hacksaw, but be careful. File
the cut areas smooth.
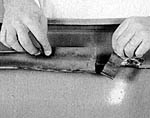
The rubber gap will need to be trimmed to match the cutoff
metal lip
|
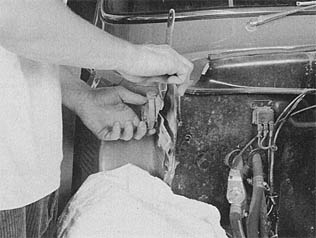
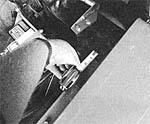
New holes are drilled in the hood to mount the framework,
We used a deep-well socket to keep the drill from punching through
the other side.
These slick Teflon rollers bolt right up to the existing
hole. A nut is to the inside for extra security.
Remove the old hinges from the truck.
|
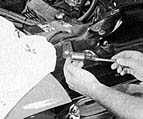
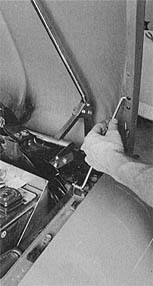
Remove this bolt from the top of the inner fender area
in preparation for installing the track.
The track has a stud on it that slides down into the
hole.
A nut is threaded onto the stud from underneath the fender,
|
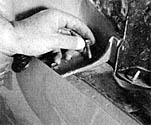
This stainless steel dress-up plate mounts to the area
where you removed the old hinge to pretty things up.
One hole for the framework's hinge already exists.
Put the bolt in, then grease the inside of the tube.
|
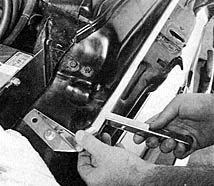
The crossbar for the hinge
can be slipped into the two ends by simply sliding one of them sideways.
 Once the crossbar in place you can drill the second hole
on each side to secure the crossbar hinge. 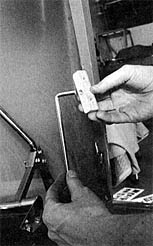
This nice piece is attached to the hood to give the prop
rod something to attach to.
|
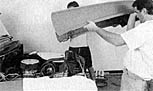
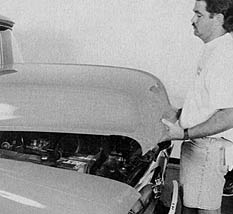
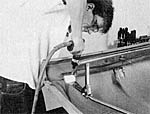
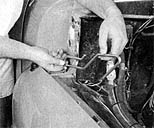
Very, very carefully, line the hood up for reattachment.
Watch all the corners, and protect the fenders with towels.
A While a buddy holds the hood (if you're really popular,
get two buddies to help), attach the crossbar to the framework under the
hood, Close the hood a few times (very carefully) to make sure everything
is lined up properly.
Classic Performance products includes a neat prop
rod with its kit. Measure back the prescribed distance and drill
two holes to attach it.
|
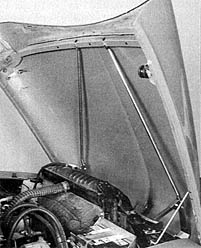
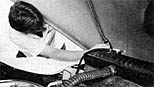
Now you won't have to worry about the wind blowing your
hood shut. This prop rod stays out of the way so that you can work
on your engine.
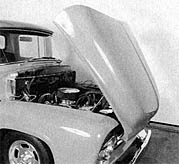
If you've got an engine compartment worth showing
off, a reverse-rilt hood is a visual eye-popper.
|
|
| Classic Performance Products 378 E Orangethorpe
Ave., Placentia CA 92870 Tech Line 714-522-2000 |
 |
TECH
| BOOKS | SUSPENSION
| BRAKES | STEERING | CONTACT
US | HOT PRODUCTS |

|
| © Classic Performance Products. This "website"
and all contents are property of Classic Performance Products.
Prices subject to change without notice. Not responsible for
errors or omissions. Please note that kits & prices
may vary between certain applications. |
|
|
|
|
|
|
|