| LOADING A FRESH CLIP |
| By Scott Parkhurst |
|
|
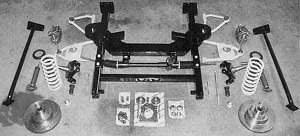
Classic Performance Products established themselves long ago
as producers of top quality suspension parts. This bolt-on front clip is
custom fabricated from top-quality materials, and as you can see from the
photos, leaves you with a trick rack and
pinion front end, top-notch discs, and racy tubular supports.
We started with a clean '67 Nova SS
that had originally been equipped with a
straight six and a powerglide. After
locating this low-mileage gem, we immediately tore it down for some serious
restyling. It took about 12 seconds to get over the guilt of modifying a
low-mileage genuine SS, as the six-holer under the hood did some damage
to the future collectability of the car. With the 230/2 speed out of the
way and a serious 383/700R4 going together, the spindly stock front suspension
was in dire need of upgrade. This kit from CPP is the perfect choice. It
is completely bolt-on and completely streetable. We removed the front fenders,
inner fenderwells, core support, and grille assembly to facilitate unbolting
and yanking the entire stock front clip. The only hitch was the huge factory
rivets at the base of the core support. We were able to exorcise our frustrations
freely with a large punch and hammer once the heads had been ground smooth.
With the rivets out of the way, the core support assembly could be placed
aside. We moved on to the eight bolts that run from the body to the front
frame stub, and after freeing them, you can see we were able to wheel the
entire stock front suspension out as one piece. Assembly of the new front
suspension started with bolting the new CPP frame section to the same eight
hard points we had just removed the stock unit from. |
With this completed, we bolted on the upper control arms,
and compressed the coils in preparation for the lower arms. These tubular
pieces are of outstanding quality, and everything fit together fine. The
coils, spindles, and shocks all fit between the control arms easily, and
our front end started looldng recognizable after only a couple hours worth
of effort.
We're sticklers for good braking, and even though we know that stepping
up
to discs would make a dramatic improvement in our braking performance, we
opted to send them out and get them cross-drilled as well. This may be overkill
for our street application, but if we decide to step up the power in this
car, or decide to nm it down the track in the future (it seems like we always
do), we're ready. The discs and calipers were fitted with bearings and temporarily
installed on the spindles for fit (that means don't send us letters asking
where the grease was). We'll be tearing it all apart again soon to get the
calipers and rotors powdercoated. The crew at Classic Performance Products
(Buena Park, CA) upgraded us even further with one of their booster/master
cylinder/proportioning valve kits. We will have late-model braking power
and comfort from this project, and the quality and simplicity of the Classic
Performance kit was exactly what we were looking for. We were able to use
the factory holes for mounting, and once the original master cylinder mount
studs were drilled out (some are much easier just to pound out, ours required
more effort) getting the booster mounted and hooking up the original brake
pedal was simple. At this point in time, we wish to retain our original
steering column. Connecting the stock column to the CPP's rack and pinion
requires a bit of engineering. |
Luckily, the experts at Classic Performance also specialize
in steering adaptations in addition to suspension and brake mods, so we
were in good hands. A custom steering shaft and universal joints will keep
us aimed straight.After completing the basic installation, we were very
impressed with the quality and ease of this kit. CPP has put together one
sweet piece and the
improvement in ride quality, braking, and steering over the factory system
will be well worth the effort and expense. We will fabricate new inner fenderwells,
but the original ones could be cut and reused. Early ('62-67) Novas suffer
from a shaky front suspension, and now this bolt-in setup can cure all the
woes while strengthening the assembly. The support tubes bolt up where the
factory fenderwell mounts were, and make for a stronger overall assembly
with a competition look. Check out the photos and follow us through this
big-but-simple job. There is a lot of work involved, but none of it is very
difficult. With the help of a few talented friends and a fridge full of
cold ones,' you could easily get through this in a weekend. |
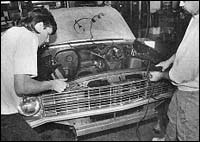 |
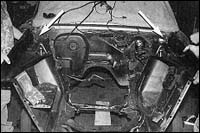
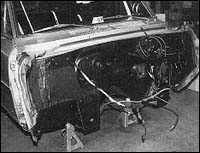
| With the engine, transmission, and front fenders removed,
all that was left to disassemble was the grille assembly before tearing
into the old clip. |
|
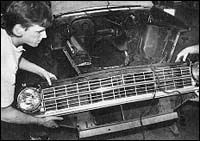 |
| The core support and grille assembly were removed as one piece.
Careful research showed we didn't have to break the whole thing down to
nuts and bolts to get it out of the way, which suits us just fine. |
|
 |
| There are four bolts on each side of the front clip that actually
hold the entire front suspension on. They are not difficult to access once
you get the sheetmetal out of the way. You can see two of them in the picture,
the other two are on the inboard side of the frame. Don't forget to disconnect
the steering column from the box. |
|
 |
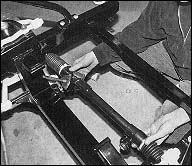
| After the eight frame stub bolts are removed from the bottom,
there are three bolts per side at the top of the fenderwells (where they
meet the firewall) that must come out You can see all six empty holes here,
as we begin sliding the entire front suspension away from the car. |
|
 |
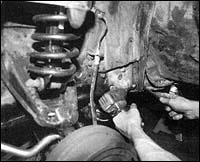
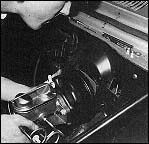
You can see how the steering box must be moved forward and
down simultaneously to get these splines out of the column. It takes a bit
of effort, but it's much easier than removing either the
box or the column completely. |
|
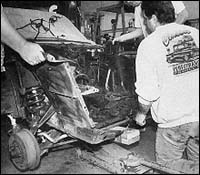 |
| With the bolts out, a jack positioned correctly, and a few
friends to help, we were able to move the entire front suspension in one
swoop. The steering column splines will have to be guided out as the front
clip moves away from the rest of the body. |
|
 |
| After some time with the cleaner/degreaser and the rattle
cans, our old firewall was looking pretty good. Time to slide that new frame
stub in place. |
|
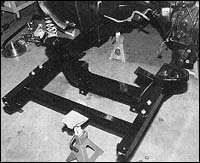 |
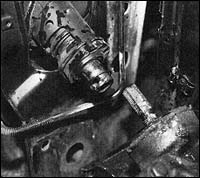
| The CPP frame stub mounts up right where the old one was.
It lined up fine, and once we got all the new bolts started, it was simple
to snug into place. |
|
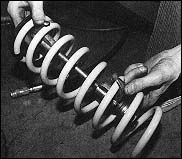 |
The new upper and lower control arms were a sim-
ple bolt-on. The coil springs needed to be com-
pressed before we could get the spindles in place. |
|
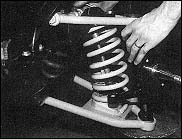 |
With the compressed coil located between the
control arms, we got the spindle over the balljoints
and got the castellated nuts started. |
|
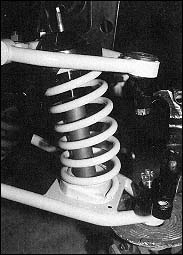 |
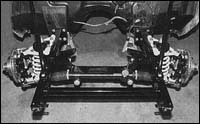
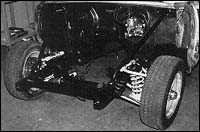
Once everything is in place, it should look like this.
Take a second to check out the beautiful weld on
the lower tubular control arm. That's good quality. |
|
 |
We began installation of the disc brakes by bolting
on the caliper bracket |
|
 |
| Then, we slid the rotor over the spindle and got the caliper
in position to check for fit. |
|
 |
| We bolted the cross bars up to the firewall, and stood back
for a look before getting the steering rack mounted. Looks good to us. |
|
 |
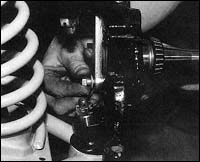
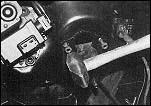
| Mounting the rack was relatively simple. The bolts are kind
of difficult to get to, but once you have them started, let the air tools
do the work. |
|
 |
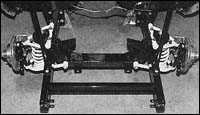
Wow! Its hard to believe this is the same car we started with.
The kit is very complete, and the results are obvious. The power booster/master
cylinder/pro-
portioning valve were next. |
|
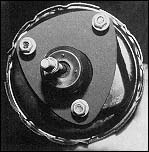 |
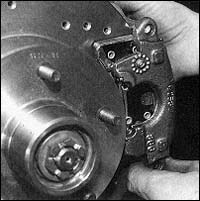
| This is the back of the power booster. It is designed to fit
in the existing holes, and the only hole that needs to be drilled is the
lower one. |
|
 |
| Knocking out the old studs was a great way to get back at
the car, but it won again. We ended up cutting the studs down and drilling
them out Good luck on yours. |
|
 |
| With the old studs out of the way, the new assembly from Classic
Performance fit perfectly. |
|
 |
| Finished! At least for the moment We have much to do, but
you can see the difference these kits make. With help from Classic Performance,
we'll be cruisin' with confidence, knowing we can turn corners and stop
when we'd like to for a change. By the time you read this, inner fender-panel
kits will also be available. |
|
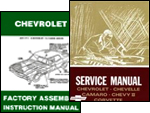 |
| It's always best to have shop and assembly manuals on hand
to make sure your installation is correct and to make the project as easy
as possible. We recommend factory manuals, available at Greg's
Automotive |
|
|
|
| Classic Performance Products 378 E Orangethorpe
Ave., Placentia CA 92870 Tech Line 714-522-2000 |
 |
TECH
| BOOKS | SUSPENSION
| BRAKES | STEERING | CONTACT
US | HOT PRODUCTS |

|
| © Classic Performance Products. This "website"
and all contents are property of Classic Performance Products.
Prices subject to change without notice. Not responsible for
errors or omissions. Please note that kits & prices
may vary between certain applications. |
|
|
|
|
|
|
|