| SWAPPING DRUMS FOR DISCS ON A HIGH-TECH NOMAD |
| By Chris Fesler |
|
|
If you have ever owned a car from the '50s, then you are probably
aware of its need for better acceleration and
inherent lack of braking prowess. Most, if not all, cars from the '50s were
equipped with bulky drum braking systems. They provided only the most basic
function, to stop. |
Today, however, with more companies creating disc brake upgrades,
the old drum system is neither popular or safe.
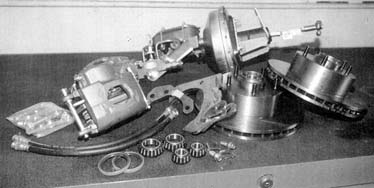
Classic Performance Products is one of the companies which specializes in
drum-to-disc brake conversions. We called on them to help us with 12-volt
leader Audiobahn's '55 Chevy Nomad, which was weighed down with a couple
thousand pounds worth of stereo equipment. |
These cars are already heavy, but the extra weight made the
drum braking system a safety hazard.
We took the car to Ballistic Motorsports in Mission Viejo, California, for
the installation. Having feared that the install
would be time consuming and confusing, we were delighted when, after only
two hours, we were on our way. |
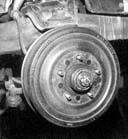 |
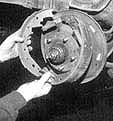
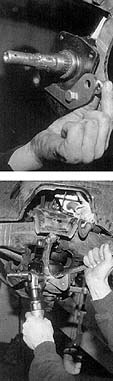
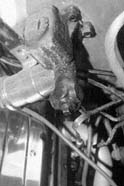
| The front braking system looked exactly like the rear. a big
drum. This system is not exactly up to today's standards for braking power
and safety. |
|
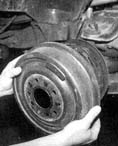 |
| The first step was to remove the drum cover. This piece is
what protects the components responsible for your braking. |
|
 |
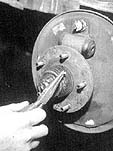
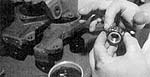
| Next, the retaining clips which hold the drum pads in place
needed to be removed as well. Using a set of needle nose pliers, we carefully
removed the clips and discarded them. We would not reguire these items with
the new components. |
|
 |
| Once the retaining clips had been removed, the shoes were
taken off and discarded. The cotterpin was slipped off, and the wheel adapter
was pulled. All of these components need to be removed all the way down
to the bare spindle. |
|
 |
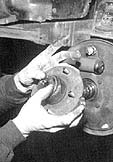
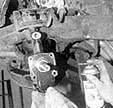
| The backing plate was held on with four Bolts along with the
attached steering arm. both of these parts needed to removed. |
|
 |
| The new bearings did not come pregreased. Therefore we had
to use a high-temperature grease to ensure every piece was lubricated. If
this step were avoided, the bearings would seize up and fall apart. |
|
|
 |
Since we were dealing with a 16-year-old braking system, there
was a bit of cleaning to do. Standard brake cleaner was used to clean away
any old grease along with old brake
residue that collects in the crevices. |
|
 |
| To keep things looking nice and new, black spray paint was
used to improve the look of the stock spindle. |
|
 |
| To keep things turning smoothly, an extra coat of grease was
applied to the spindle shaft. |
|
 |
| Our new brakes came from the factory with a coating on them
that would not benefit our braking performance. We used a brake cleaner
to help remove this coating. |
|
 |
| The next step was to install the grease-packed wheel bearings
into the rotor. After the bearings were placed, they were followed by the
grease seal. The seal prevents any dust or debris from getting into the
bearing. |
|
 |
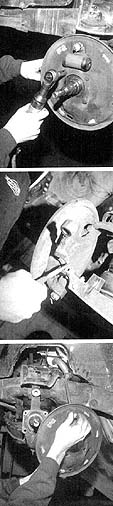
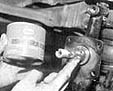
| Next, the caliper bracket was mounted to the spindle. We used
the supplied spacer and hop to secure it. At this point we did not tighten
the holt, only snug fit it. |
|
|
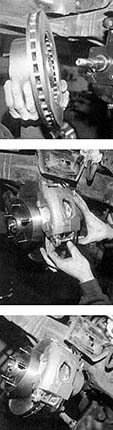 |
| With the installation just about finished, the rotor was attached
to the spindle with the bearing retaining washer and spindle out. With the
rotor in place we checked for proper clearance between the rotor and the
mounting hardware. With everything in check fire rotor was tightened, and
the caliper was installed on the new bracket. |
|
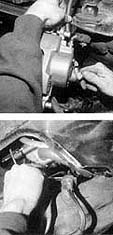 |
| Since the Brake lines were at least 20 years old, we took
the liberty of replacing them with new ones. |
|
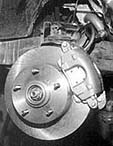 |
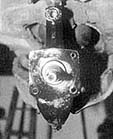
| Finished rotor, caliper and lines. |
|
 |
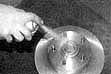
| The capacity of the old master cylinder wasn't big enough
to supply the proper amount of pressure for the new disc brakes. Classis
Performance Products supplied a new, larger volume master cylinder. |
 |
The original master cylinder was removed and replaced with
the new, larger unit. Once everything was installed properly, the entire
system had to be bled to ensure that there were no air bubbles. With the
new
master cylinder in place, we called if a day and packed up. |
|
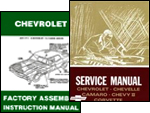 |
| It's always best to have shop and assembly manuals on hand
to make sure your installation is correct and to make the project as easy
as possible. We recommend factory manuals, available at Greg's
Automotive |
|
|
|
| Classic Performance Products 378 E Orangethorpe
Ave., Placentia CA 92870 Tech Line 714-522-2000 |
 |
TECH
| BOOKS | SUSPENSION
| BRAKES | STEERING | CONTACT
US | HOT PRODUCTS |

|
| © Classic Performance Products. This "website"
and all contents are property of Classic Performance Products.
Prices subject to change without notice. Not responsible for
errors or omissions. Please note that kits & prices
may vary between certain applications. |
|
|
|
|
|
|
|