 |
| Classic Performance Products |
| Tube Bending - Basic Tubing Tutorial - Part
2: Flaring |
| By Rob Fortier |
|
|
|
Last month, we covered the basics of tube bending using
various tools, from the standard entry-level benders all the way up to the
fancy specialized ones. Any of you who went out and tried your hand will
probably attest to the difficulty in getting the hang of it, but with a
little practice, anyone can become a self-taught tube bending pro. This
month, let's take a look at the other sometimes dreaded task: tube flaring.
If you're like me, flaring tubing isn't one of your favorite
things to do in the garage-or maybe it is. In the past, I'd always have
a heck of time making even halfway decent flares. The particular tools could
be mostly to blame, but I'm pretty sure it had a lot to do with my inexperience
with the process, as even the best tools can perform poorly if not used
properly. But, as we learned with the bending procedures, the better the
tool's quality, the better the outcome, which makes perfect sense for the
most part. However, that's not to say you need to go and get the best money
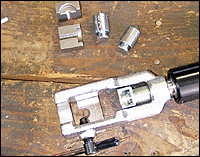
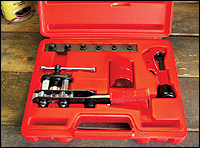
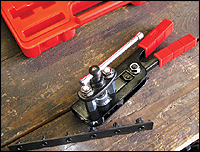
can buy if you're only going to be doing occasional flares. |
Experimenting with various flaring tools, I found that while
the expensive ones do work great, the average-priced ones produced results
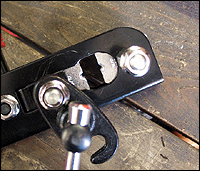
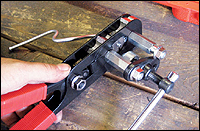
nearly as good-and even one of the cheap ones, too! Amount of usage, skill
level, and personal preference will determine what you ultimately end up
with. Every classic truck that I know of currently on the road has brake
lines. Similarly, they also have fuel system plumbing, although that can
be comprised of AN fittings, which don't apply here. In other words, if
you're asking yourself, "What does tube flaring have to do with me?"
just consider the possibility of having to repair a damaged or worn line
some day. Since I'm currently in the beginning stages of a frame-off project,
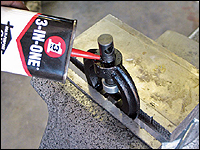
I knew there'd be days filled with bending and flaring chores, which was
the main inspiration for learning more. For most applications, you'll deal
with 45-degree double flares (other types, such as bubble flares, Metric
ISO flares, and single flares will not apply). |
Tube flaring facilitates a seal between a threaded nut and
the inverted-flare seat (either another fitting or a destination point such
as the master cylinder). If you have any prior experience with flaring,
then you're fully aware of the messy consequences of a poorly flared line:
it leaks. Because the tubing is actually being squashed once the fitting
is tightened, the best seal occurs initially; removal of said fitting will
only promote wear and fatigue, so it's best not to lock that nut down till
you're sure everything is A OK. Just as important to the sealing is the
shape of the flare itself, so before you even insert a piece of tubing into
your flaring tool, make sure that the end is cut even and the tube's ID
is perfectly round. From there, get comfortable with your tooling of choice
and flare away! |
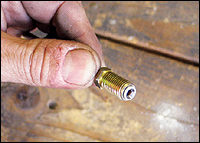 |
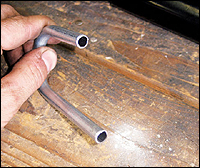
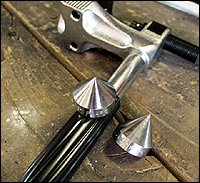
| 1. This is your standard 45-degree double flare. It provides
the seal between the threaded male fitting and the seat, so it has to conform
on both ends, even though it does get squished once it's tightened down.
Any inconsistencies in shape or size will affect that seal and ultimately
cause leaks. |
|
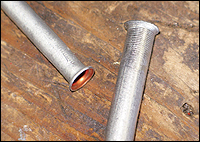 |
| 2. Here are two previous attempts of mine I've saved as a
little reminder of what not to do. Though they appear to be single flares,
in reality they're "backward" doubles (the flaring process was
reversed), and thus they won't provide much, if any, seal in the inverted
seat. |
|
 |
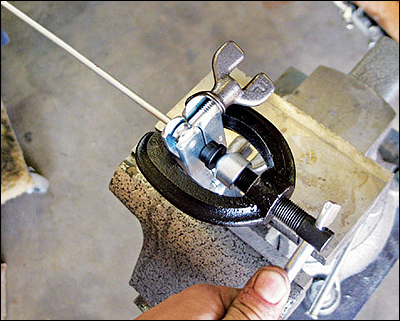
| 3. Another flaring memento is this gem that got a little loose
on me whilst clamped in the tool. Not being clamped in properly along with
an unevenly cut end were to blame, but this could have been avoided had
I known what to look out for. |
|
 |
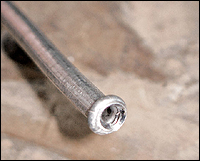
| 4. On top of a nice, perfect cut, you need to make sure the
tubing is free of any burrs, as they will adversely affect the flare's outcome.
That's where the little pointy thing on your tubing cutter comes in real
handy! |
|
 |
| 5. Don't always assume brass coloring means an inverted flare-compression
and pipe fittings are made of brass, but they don't intermingle with others
thread-wise. Besides thread pitch, an easy way to tell is simply by the
male and female flared shapes. |
|
 |
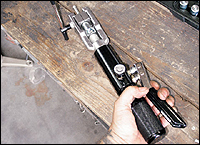
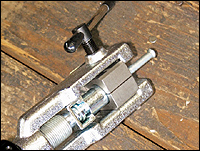
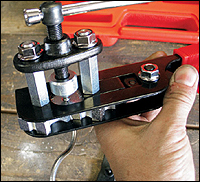
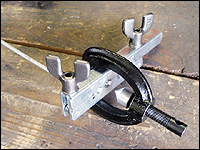
| 6. Let's start with the big gun first: With its hydraulic
hand pump, perfect flaring is almost effortless. Along with single and double
flares, the kit will also do bubble and push-connect flares. |
|
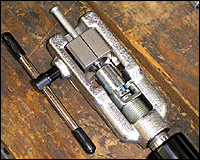
 |
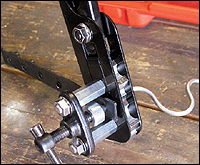
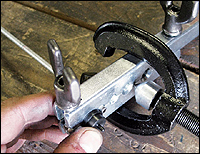
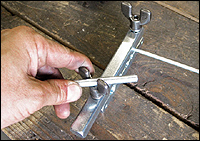
| 7. As the name might suggest, double flaring is a two-step
process. With the Universal tool, initial setup is not clumsy like you may
have experienced with others. |
|
 |
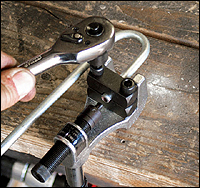
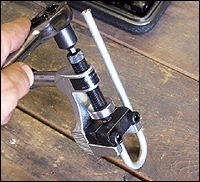
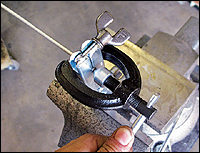
| 8. Insert the tubing into the corresponding clamp so that
the end of the tube is flush with the outermost edge of the clamp (about
an 1/8-inch sticking out), then lock it in place. With the pressure valve
released, thread the handle out in order to insert the flaring die. |
|
 |
| 9. Once everything is set up correctly, close the pressure
valve and start pumping. Stop once you feel the die bottoming out.... |
|
 |
| 10. ...If you don't feel that within a few pumps, the tubing
may not be clamped in tight enough. |
|
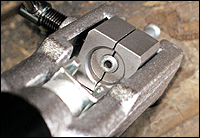 |
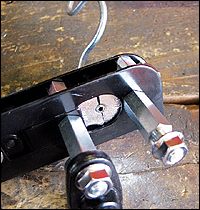
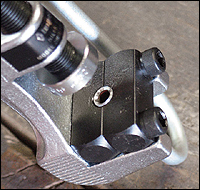
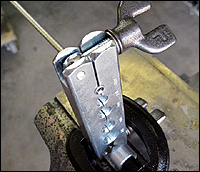
| 11. Next, release the pressure valve and check to see how
your first flaring step went. If it looks like this, you're on the right
track; otherwise, something went wrong during the process. |
|
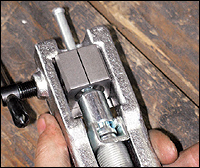 |
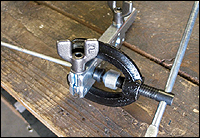
| 12. Repeat the first step, but with the 45-degree cone die
instead. I found that by not bottoming the cone out, I got a nicer double
flare that seated the best, as there was more "material" to squish
and conform to the inverted flare properly. |
|
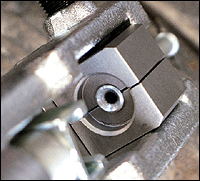 |
| 13. You wouldn't have caught me making flares this nice in
the past. It was pretty amazing how well and, almost as importantly, how
easily the Universal tool performed. I know what I'm asking Santa for this
year! |
|
 |
| 14. The next item is the one that surprised me the most. CPP's
new double-flaring tool won't hit you in the wallet hard, but it will provide
excellent results. |
|
 |
| 15. Along with being affordable, the tool's also very easy
to use thanks to rotating non-removable clamps and dies permanently mounted
on a single strip of metal. |
|
 |
| 16. Simply flip open the die handle on the tool and select
the appropriate clamp size. |
|
 |
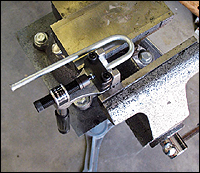
| 17. Insert tubing so that the end protrudes to where it's
even with the outside of the tool's frame, then lock the guides into place
by squeezing the plier-type handles together. |
|
 |
| 18. Insert the corresponding flare die, in this case 3/16,
and thread it into the tubing until the die bottoms out on the guide. |
|
 |
| 19. Back the die out and check your first flare. You know
the routine-if it's got a nice bubble shape, proceed; otherwise, try it
again. |
|
 |
| 20. The cone is permanently attached, so once you remove the
flare die, run the cone back into the tubing, but don't bottom it out. |
|
 |
| 21. Like I said, it was surprising to see such good results
from such an affordable tool. It even comes with its own cutter! |
|
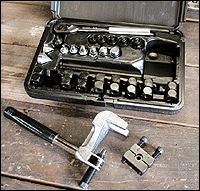 |
| 22. Next, we climbed back up the cost ladder with Imperial
Eastman's Flare Pro 4 in 1 kit. Along with its various flaring capabilities,
it's also equipped for swaging lines, which is handy for HVAC and coolant
applications. |
|
 |
| 23. The hardened clamps attach with the supplied Allen bolts.
Be sure to set the depth (amount of tubing sticking out) before fully tightening. |
|
 |
| 24. With the exception of the CPP tool, each one illustrated
can also be used in a vise if needed for additional leverage or simple laziness! |
|
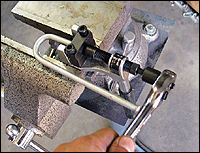 |
| 25. Using the supplied reversing ratchet with the 3/16 die
attached, tighten until the die contacts the clamp. |
|
 |
| 26. As mentioned, the Flare Pro comes with both 37- and 45-degree
cones, so make sure you use the appropriate one. |
|
 |
| 27. Tighten the cone into the flare until you start to feel
tension, then back off and check the results. |
|
 |
| 28. By now, the act of forming the flares was second nature;
I just had to familiarize myself with each of the specific tools. As you
can see, this one makes a mighty fine flare, too. |
|
 |
| 29. Finally, here's the tool most are familiar with. Basic
manual single, double flaring kits like this one from Eastwood are common
and are more than sufficient for occasional use. However, be cautious of
extremely inexpensive ones, as the components will not hold up for very
long. |
|
 |
| 30. When setting the depth with this one, simply use the flaring
die as a guide, as shown. |
|
 |
| 31. Clamp down as tight as you can-it will scar the tubing
some (most of which gets concealed behind the male fitting), but you don't
want the die pushing the tubing out. |
|
 |
| 32. Insert the die and bottom out on the tool face-you know
the routine by now, right? |
|
 |
| 33. Because of its shape and size, this type of tool is sometimes
easier to manage when clamped in a vise. |
|
 |
| 34. Don't always equate inexpensive with cheap. I produced
some great double flares with the entry level model. Granted, it was new
and I wasn't able to put many sessions under its belt, but I'd still recommend
it for infrequent use. |
|
 |
| 35. The one thing that applies to each and every tool featured:
Upkeep, primarily lubrication, not only prolongs their life, it keeps your
tools working the way they were meant to. |
|
|

