 Tie-Rod Upgrade Tie-Rod Upgrade
1932- 1959 Chevy/GMC Specific
Ball to Tapered Stud - General
MOST IMPORTANT
Safety is the single most important factor when undertaking
any modification project. Any changes should be carefully studied to see
how the modification will effect other components. The planed modification
itself must be looked at closely to see if it and the components used are
safe.
ORIGINAL EQUIPMENT
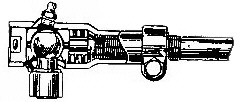 Originally, the early trucks from 1932
to 1959 used a tie rod end that cupped a ball trunions on the end of the
steering arms. These tie rod ends consist of five separate parts contained
in the housing. These parts are the seats, spring, safety plug and end plug.
The seat caps surround the ball trunions and are held in place by spring
tension exerted by screwing down on the end cap. As an assembly, the tie
rod sits atop the ball trunions on the end of the steering arm. A foam rubber
washer between the housing and the trunions base it used to seal water and
dirt out. A grease zerk in the house provides a means for lubrication. Originally, the early trucks from 1932
to 1959 used a tie rod end that cupped a ball trunions on the end of the
steering arms. These tie rod ends consist of five separate parts contained
in the housing. These parts are the seats, spring, safety plug and end plug.
The seat caps surround the ball trunions and are held in place by spring
tension exerted by screwing down on the end cap. As an assembly, the tie
rod sits atop the ball trunions on the end of the steering arm. A foam rubber
washer between the housing and the trunions base it used to seal water and
dirt out. A grease zerk in the house provides a means for lubrication.
A REAL PROBLEM
 The real problem with the original
tie rod assembly is its strength and durability. The foam seal did not last
long, which allowed water and dirt to enter the housing causing rust. In
areas of the country where salts and chemicals are used to control ice and
snow, it only worsens the effect. Soon the spring would freeze or brake,
increasing the possibility of separation from the steering arm. Old grease,
which harden in the housing end, also fouled the spring causing the same
problem. Under hard braking and turning situations, the tie rod and steering
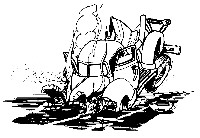
arms would separate causing catastrophic results. The real problem with the original
tie rod assembly is its strength and durability. The foam seal did not last
long, which allowed water and dirt to enter the housing causing rust. In
areas of the country where salts and chemicals are used to control ice and
snow, it only worsens the effect. Soon the spring would freeze or brake,
increasing the possibility of separation from the steering arm. Old grease,
which harden in the housing end, also fouled the spring causing the same
problem. Under hard braking and turning situations, the tie rod and steering
arms would separate causing catastrophic results.
Up until the mid ‘60’s
most trucks required chassis lubrication every 1000 miles or 4 months, which
ever came first. This type of lubrication requirement was sooner than a
regular oil change, so it wasn’t done on time in most cases. There
are 24 lub points on a stock 48-55 1st truck. If you are not doing your
own chassis lubrication, then I can almost bet you that not all your lub
points are getting their fair share of lubrication. The point is, the lack
of lubrication leads to the early failure of any tie rod and this tie rod
isn’t very tough to begin with.
REPLACMENT
 The
original design tie rod, when in new condition, is pretty solid. There is
a little spring give in the connection to the steering arm, but acceptable.
Add some time, radial tires, a rough road and you get squirrely pulls and
lane floating. If you add disc brakes to the picture, you get a disaster
waiting to happen. This is why you would want to replace the old style OEM
tie rod end with the new OEM replacement ends. Sealed Power used to be the
largest manufacture of these replacement ends, they have since discontinued
production and are now manufactured by Golden State Pickup Parts. The
original design tie rod, when in new condition, is pretty solid. There is
a little spring give in the connection to the steering arm, but acceptable.
Add some time, radial tires, a rough road and you get squirrely pulls and
lane floating. If you add disc brakes to the picture, you get a disaster
waiting to happen. This is why you would want to replace the old style OEM
tie rod end with the new OEM replacement ends. Sealed Power used to be the
largest manufacture of these replacement ends, they have since discontinued
production and are now manufactured by Golden State Pickup Parts.
GETTING DIRTY
Anybody can do this job if
they have a hammer, screwdriver, adjustable wrench and a flat file. There
is no machine work in this project. If your real good (lucky) you may not
need to rest the toe-in. This project takes about 4 hours and is one of
the best upgrades you can do on the early trucks. Please remember, SAFETY
is the name of the game when modifying any OEM design configuration.
First things first, I plan
to leave out all the details of this project that are of the common sense
variety, like use wheel blocks, stand jacks, your head, ect…
 Ok,
first, set the tires straight forward on the ground. Then measure from the
center of the ball trunnion on each of the steering arms. This measurement
will be needed to set the proper length of the drag link. Following this
method will usually prevent the need to reset toe-in. Sometimes you have
to remove the wheels and hub in order to loosen the steering arm bolts.
If this is the case, jack up the front end and scribe a center line on the
center tread of each front tire. Measure the distance between the tire centers
for a second reference. Ok,
first, set the tires straight forward on the ground. Then measure from the
center of the ball trunnion on each of the steering arms. This measurement
will be needed to set the proper length of the drag link. Following this
method will usually prevent the need to reset toe-in. Sometimes you have
to remove the wheels and hub in order to loosen the steering arm bolts.
If this is the case, jack up the front end and scribe a center line on the
center tread of each front tire. Measure the distance between the tire centers
for a second reference.
Next, remove both steering
arms and drag link as a unit. The driver side steering arm will need to
be separated from the steering link before removal. Remove the cotter pins
and unscrew the end caps on the old tie rod ends. Separate the tie rod ends
from the steering arm ball and remove the drag link Grind or file the swaging
off the bottom side of the ball trunnion. You have file off enough of the
swage when you can see a small circle appear on the casting boss. Drive
the trunnion out with a punch or old screwdriver. After the ball has been
removed, dress the other side of boss with a file. Clean, paint and reinstall
the steering arms.
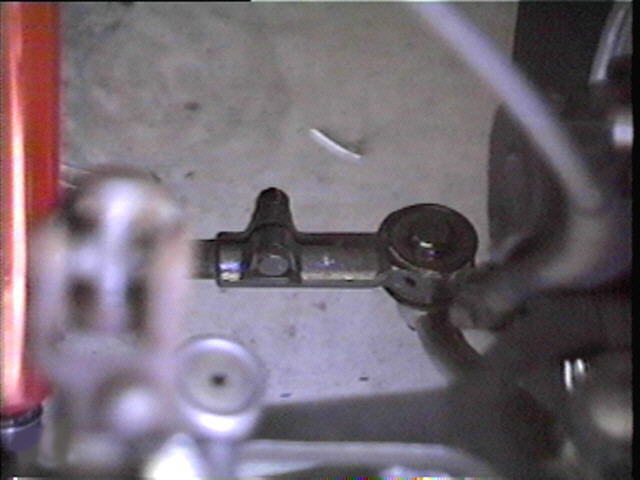
 Next,
remove the old tie rod ends from the drag link. Clean & paint the drag
link shaft. Wire brush the threaded ends to remove any paint. Center the
tapered stud on the new tie rod and thread them on the drag link. The stud
on the new tie rod ends will be the new center to center distance. The goal
is to replicate the same length of the old assembly. Once the original center
to center measure has been achieved, test the assembly in the new holes.
You should be real close. If the tires are still on ground do not force
the studs off center in an attempt to mount the drag link. Simply adjust
the tie rod ends in or out evenly until the assembly slips in easily. If
the wheels are off the ground, adjust the drag link in or out to achieve
the same center to center distance between tread centers. Install and tighten
the castle nuts on the new tie rod ends, don’t forget the cotter pins.
Tighten the tie rod ends collar clamp to secure them firmly on the drag
link shaft. Install the lubrication zerk and lub the tie rods. Test drive. Next,
remove the old tie rod ends from the drag link. Clean & paint the drag
link shaft. Wire brush the threaded ends to remove any paint. Center the
tapered stud on the new tie rod and thread them on the drag link. The stud
on the new tie rod ends will be the new center to center distance. The goal
is to replicate the same length of the old assembly. Once the original center
to center measure has been achieved, test the assembly in the new holes.
You should be real close. If the tires are still on ground do not force
the studs off center in an attempt to mount the drag link. Simply adjust
the tie rod ends in or out evenly until the assembly slips in easily. If
the wheels are off the ground, adjust the drag link in or out to achieve
the same center to center distance between tread centers. Install and tighten
the castle nuts on the new tie rod ends, don’t forget the cotter pins.
Tighten the tie rod ends collar clamp to secure them firmly on the drag
link shaft. Install the lubrication zerk and lub the tie rods. Test drive.
WRAP UP
After you have test driven
the vehicle you will have to decide whether it needs the toe-in reset. If
you feel that the toe-in needs to be reset, rotate the rear tires to the
front and test drive the vehicle again. If you still feel the toe is out,
I would refer you to the factory manual for setting the toe-in yourself.
If you feel you are not able accomplish this task yourself, then you should
try an alignment shop that understands older vehicles. There is not a lot
to setting the toe on these trucks. | 
