 |
|
 |
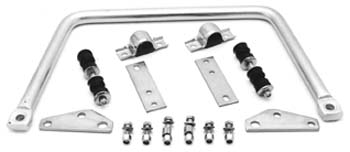
| 1. I bought the Classic Performance Products
front anti-sway bar kit from Chevy Duty. I installed it on my 1953
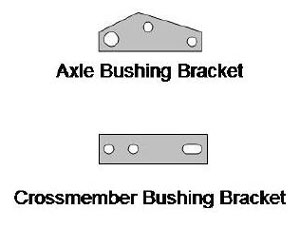
Chevy 3100. Here are drawings of the brackets that mount the bar. |
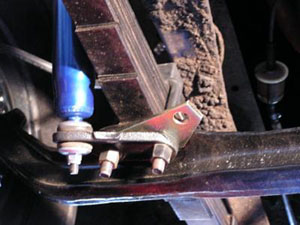
2. The axle brackets mount to the front
u-bolts. The sequence is spacer washer, then sway bar bracket, then
shock absorber bracket, then retaining nut. Click on the pictures
for a larger image. Use the Back button to return. |
|
|
 |
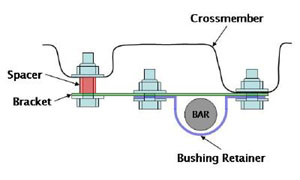 |
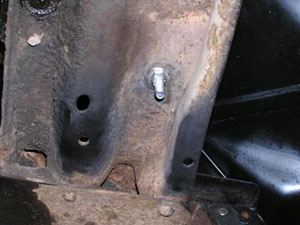
| 3. The cross member brackets bolt to existing
holes in the front cross member. The rear hole holds just the bracket.
while the front hole holds the bracket and the bushing retainer. The
short spacer goes under the rear of the bracket to make it level. The hole
in the center of the bracket holds the other end of the bushing retainer. |
4. Here is a drawing showing how the bracket
and retainer bolt to the cross member. |
|
|
 |
 |
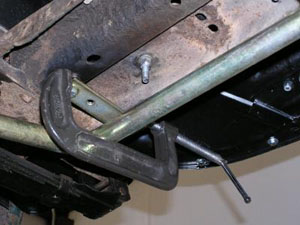
| 5. I didn't have a helper, so I used some
C-clamps to support the bar while I attached the bushing retainers.
it's too heavy to hold up one-handed. |
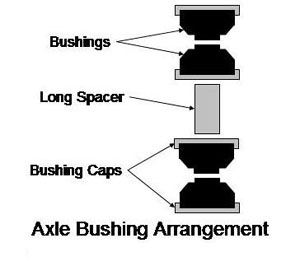
6. Here's the arrangement of the various
parts that make up the end link. The axle bracket is sandwiched between
the bottom two bushings while the bar goes between the top two. Be
careful to get the bushing caps on correctly. They are easy to put
on upside down. |
|
|
 |
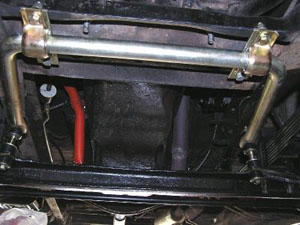 |
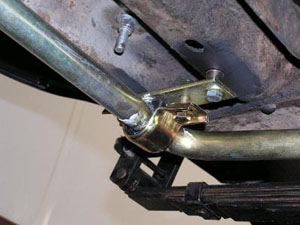
| 7. All bushing sets were installed before
tightening the bolts. Here you can see the spacer under the rear of
the cross member bracket. The white stuff is grease for the bushings
to prevent squeaks. It gets wiped off after the bolts are tightened. |
8. Here is the finished installation. The
camera angle makes the rears bushings look tilted. They are actually
nearly straight up. |
| |
|
|
 |
| It's always best to have shop and assembly manuals on hand
to make sure your installation is correct and to make the project as easy
as possible. We recommend factory manuals, available at Greg's
Automotive |
|