 |
| Classic Performance Products |
| Makes Adding Air Ride Suspenion Easy |
| BY MIKE SELF |
|
|
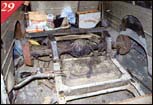
| Are there still any real deals left on classic trucks these
days? Well, as we found out, there are. We recently picked up a '65 GMC
Suburban with a new crate 454 engine, 700R4 tranny, power steering, power
brakes, front discs, and a tilt column for $3,000. So what was wrong with
it? Well, other than the fact that it needs some bodywork, it sat way too
high, which obviously isn't cool. So what's the opposite of not cool? Air
bags! After checking out the suspension, it was obvious that there was quite
a bit of work ahead. This wasn't because of the type of truck it was it
was because of the 22 x 9-inch Oasis B 1 wheels and 285/35ZR22 Nitto |
tires (which are actually load-rated for SUVs!) that we were
committed to bolting onto it once the suspension was complete! Well, to
be honest, we were just going to put 20s on it, but after much convincing
from the guys at Oasis we were cajoled into the bigger wheels and tires.
As you can see, the results were well worth the extra effort. Due to editorial
deadlines, the photo you see above is of the Suburban sitting on the headers
and exhaust pipes. Once we get those taken care of the. front of the truck
will come down another 3 1/2 to 4 inches, while the rear will settle down
another 2 or 3 inches. |
If you're thinking that it sounds like the truck will lay
the rockers on the ground, you're almost right. With the suspension bottomed
out and the frame resting on the pavement, the body will only be about 1/2-inch
off the ground with no body drop! In an upcoming article, we'll cover the
installation of the air management system. |
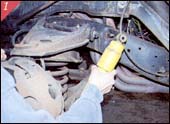 |
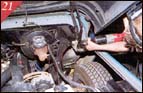
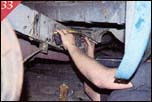
| Beginning up front, the factory shocks were removed and tossed
in the trash, since they lost their effectiveness long ago. |
|
 |
 |
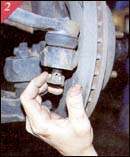
| Disassemble the front suspension and pull the spindles off
of the control arms. |
|
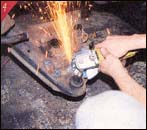 |
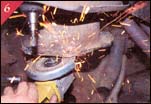
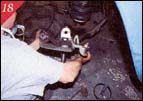
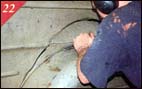
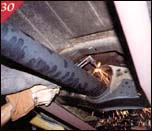
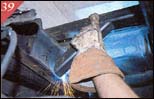
| Once the factory coil springs are out, the bump stops and
bump stop mounts must be removed to allow for full suspension travel. Since
the mounts are steel, they are cut off and ground down until smooth. |
|
 |
 |
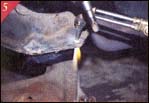
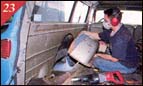
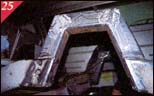
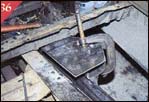
The front airbag suspension installation is pretty straightforward,
as the only mount nec- essary is an upper spring plate that will be bolted
onto the coil spring cross member.
Here, holes are cut into the cross member for the plate, and any slag or
rough edges are ground down. |
|
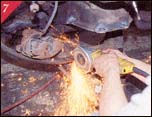 |
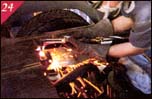
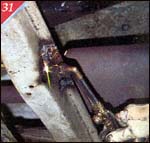
| Since the airbags will come relatively close to the sway bar,
1/2-inch is cut off the ends and rounded off with the grinder. |
|
 |
 |
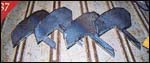
| After a template is made from a piece at cardboard,
the spring plates are fabricated from 1/4-inch steel and the mounting holes
are made to hold the plate to the frame and to hold the airbag to the plate. |
|
 |
 |
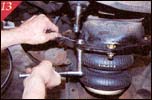
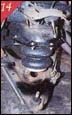
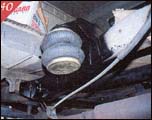
| Speaking of airbags, the ContiTech bellows were fitted with
1/2- inch air fittings, and were then bolted onto the fresh spring plate. |
|
 |
 |
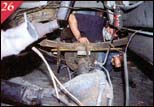
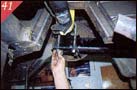
| The 1/2-inch air line is run through the frame and to the
airbag, after which the plate is bolted onto the frame. |
|
 |
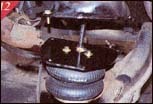
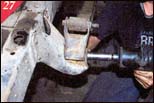
| As you can see, no lower spring plate or cup is necessary
because of how shallow the lower control arm pocket is. As everything is
smooth, there will be nothing for the air spring to rub against, and it
will be held into place just like the factory coil. |
|
 |
 |
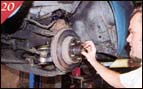
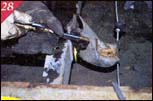
| Since the spindles were ready to go back on, we figured we'd
put on a set of Classic Performance Products drop spindles to bring the
Suburban down a couple of more inches. However, we first had to disassemble
the factory spindles and strip them of the brake rotors and hubs, bearings
and backing plates. |
|
 |
 |
| The backing plates are bolted onto the CPP spindles, and the
spindles in turn are bolted onto the control arms. |
|
 |
 |
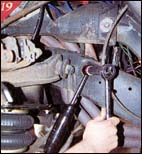
| Short performance shock absorbers are then bolted bock onto
the factory mounting locations, and the brake rotors and calipers are bolted
back onto the spindle. |
|
 |
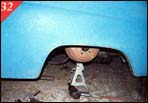
| Finally, to allow to truck to drop even further, the factory
fender wells are cut out. |
|
 |
 |
| The rear suspension transformation begins by removing the
factory fender wells and rear floor section from the truck. |
|
 |
 |
| The frame is then cut after the axle for the 3 x 3-inch notches,
which are then welded into place. |
|
 |
| The U-bolts are unbolted from the leaf springs and axle in
preparation for the removal of the leaf springs themselves. |
|
 |
 |
| The leaf springs are unbolted from both the front and rear
mounts, and the mounts are cut off. |
|
 |
| The axle is then jacked up to see if and where the drive shaft
will hit. As expected, some more trimming will be required. |
|
 |
 |
| Both cross members that the drive shaft went through or under
must be modified for clearance, and are plated in order to maintain their
strength.! |
|
 |
| With the extra clearance, the rear end is able to go up a
couple of more inches, which should lay the frame down completely on the
ground. |
|
 |
 |
Some measurements are taken for the new front two-link, which
will be made as long as possible to help maintain the pinion angle.
The Oasis wheels are bolted on to get a better idea of how much room there
will be for the bag mounts. |
|
 |
| With the axle in its fully deflated position, the lower airbag
mounts are tack-welded into place on the two-link bars. |
|
 |
| A 3 x 3-inch piece of square tubing emulates a deflated airbag
and shows exactly where the upper mounts will need to be. |
|
 |
| With the mounting locations determined, a set of gussets is
fabricated to keep the mounts in place without fear of bending. |
|
 |
 |
| The mounts and gussets are welded onto the frame, and another
cross member is added and supported with cross braces to keep the frame
from twisting under load. |
|
 |
| Once the frame is painted, the airbags can be bolted onto
the top mounts. |
|
 |
| The lower link bars can be bolted onto the new mounts, and
the airbags can be bolted onto the bars. |
|
 |
| The axle is then bolted onto the link bars with new U-bolts
and hardware, much like the original leaf spring configuration The only
thing that will be left to do is to fabricate a panhard bar to keep the
axle centered in the frame. |
|
|
|

