 |
| Classic Performance Products |
| 1955 Chevy Rear Leaf Spring |
| By Nick Licata |
|
|
|
| It's hard to believe, but there are still Chevrolets out there.
built during the Eisenhower administration, that are rolling along with
their original suspension components-albeit not very smoothly. It's a pretty
good guess the rear leaf springs and bushings are completely shot at this
point. We found this '55 Chevy that survived more than 50 years with the
same springs it had when it was driven off the showroom floor. As you can
see by the components in these photos, there's no doubt of their authenticity.
The rust and accumulated road grime alone tells you this car has seen hundred
of thousands of miles of U.S. highway over its hard-driven lifetime. You
can bet a lot of quality went into these half-century-old components. |
As the car sits now, it's built as a cruiser with 2-inch lowering
blocks. With sagging leaf springs, it's awarded a bonus downward stance
of 2 more inches. When we took the car out for a test ride with the stock
suspension, we could feel the car suffer, especially in low-speed cornering.
Talk about a boat-motion sickness got the better of two of its four occupants
during our brief 10-minute city drive. It was obvious we had a serious emergency
on our hands. So we got in touch with the folks over at Classic Performance
Products and told them about our little dilemma. They've got a bunch of
suspension components for the Tri-Five crowd, so we knew they'd have us
covered with our rear suspension issues. |
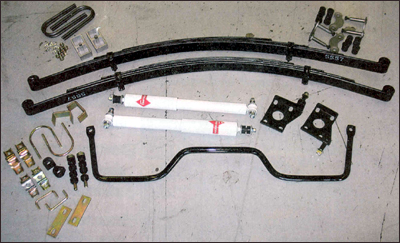
We wanted to keep the car's lowered stance, while adding improvement
to ride quality, Not a problem, CPP had just what we're looking for with
their '55-'57 Rear Lowered Multi-Leaf Spring. kit, While we were at it,
we upgraded the bushings, spring shackles, spring plates and even added
a rear sway bar, So for just under $700, you can get your Tri-Five back
in shape while attaining a more enjoyable ride, including added confidence
for those times when you feel like taking corners a little more aggressively
than you could with those old beat up, stock springs, With our classic Chevy
driving like it should, there's a good chance even good ol' Ike would be
impressed with the new and improved ride of our '55. |
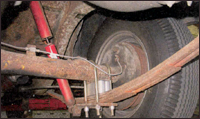 |
| Minus the 2-inch lowering blocks, here is what more than 50
years of accumulated road wear looks like. |
|
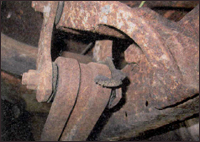 |
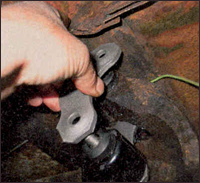
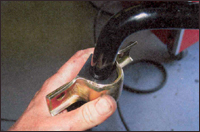
| You can tell the leaf springs and shackles are original by
the heavy "patina" and thrashed bushings. The recessed groove
in the spring is another giveaway. |
|
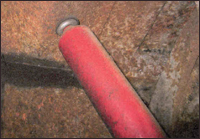 |
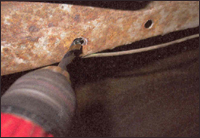
| Our first point of attack was to remove the shocks. You'll
find the top of the shock is mounted inside the trunk floor. |
|
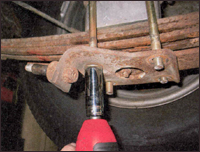 |
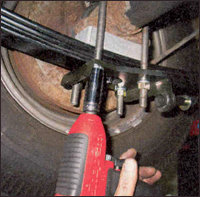
| With the shock removed, the next move was to loosen the bolts
on the existing spring plate. |
|
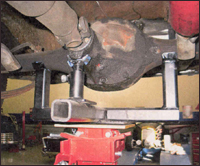 |
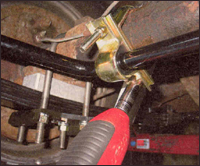
| To get this job done properly, you'll need to support the
rearend with a jack. The Source Interlink Tech Center is equipped with a
lift, so we supported the rearend with a transmission jack in order to remove
the rear springs. |
|
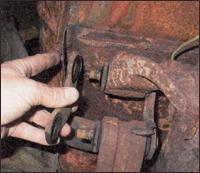 |
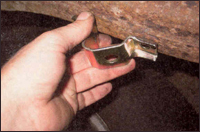
| The rear shackles came off next. You can tell by the dried-out
bushings and rust that these too, are OE. |
|
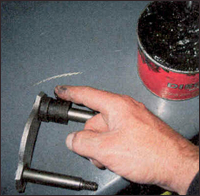 |
| Before installing the new CPP shackles, we were sure to lube
the new bushings with a good amount of automotive grease. |
|
 |
| With the new springs loaded in the rear and ready for installation,
the rear shackles and bushings simply bolted into the stock location as
the originals. |
|
 |
| The front of the spring easily bolted into the same location
as the original. |
|
 |
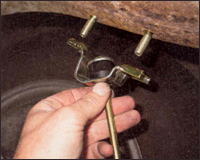
| With the leaf spring loosely bolted in place, it was time
to strap in the springs with the new V-bolts. We used the 2-inch lowering
blocks since our '55 is a street cruiser. |
|
 |
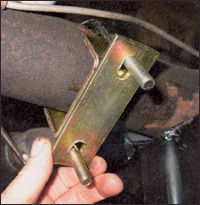
| The new spring plates not only look nice, the quality
will offer years of service and security. Since our original springs were
worn out, they inadvertently lowered the car an additional 2-inches, so
the CPP lowering springs will keep the car right down where we like it . |
|
 |
| With the leaf springs securely tightened down, it was time
to bolt in the new KYB shocks. These will make a world of difference in
ride quality compared to the worn out pieces that were on when we started. |
|
 |
| With the new leaf springs and shock mounted, it was time to
bolt in the new sway bar. First up, we loosely mounted the sway bar bracket
around the axle housing. |
|
 |
| Before the sway bar gets mounted in place, we installed the
rubber bushing and mounting bracket. Be sure to use grease on the rubber
mounts to ensure smooth operation and no squeaking. |
|
 |
| At this point we loosely
tightened up the sway bar over the axle using the supplied U-bolts. This
gave us a good idea of centering the sway bar so the rest of the install
was a breeze . |
|
 |
| With the sway bar centered and close to ride position, we
used the endlinks (not pictured) as a measuring tool to find the correct
mounting point on the frame. |
|
 |
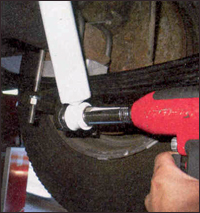
| With our mounting points properly marked on the frame, we
used a 3/8-inch bit to drill the two holes where our V-bolt will be used
to mount the endlink bracket. |
|
 |
| The top of the endlink bracket is then bolted up to the U-bolt. |
|
 |
With all the components bolted together, remember to completely
tighten down all the brackets and leaf springs. This sway bar will make
a huge difference in keeping
the car from rolling over so hard in cornering situations. |
|
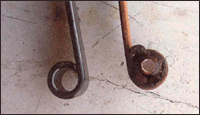 |
| Here's a look at the new spring compared to the original.
The reversed eyelets on the new CPP spring allow tor the '55 to be lowered
an additional 2 inches and stiff use a multileat spring. |
|
|

