| Improved Rear Braking From Classic Performance
Products |
| Modern Disc Braking for Classic GM Trucks |
| By Mike Self |
|
|
 |
 |
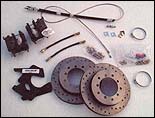
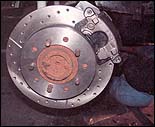
| CPP's kit is available with or without emergency cable ready
calipers. |
|
| After driving around in our Suburban for a while, we had come
to the conclusion that the present brake situation just wasn't cutting it
anymore. The problem started with a pinhole leak in one of the rear flexible
brake lines (which quickly drained the rear portion of the master cylinder),
so after we fixed that problem we became a little worried about the condition
of the rest of the braking system. True, the truck had already been outfitted
with front disc brakes and a rear end out of a 78 Chevy, but thafs not really
saying much con- sidering that the newest parts were still close to a quarter-century
old! Once we got the brakes patched up at IF Customs, we decided that it
would be in the truck's best interest (and the best interest of anyone dri-
ving it) to replace the outdated parts with some quality aftermarket stuff. |
So, a call to Classic Performance Products in Buena Park,
California, confirmed that there was indeed a front and rear disc kit available
for the 78 components that were already installed on the Suburban, and best
of all the parts were bolt-on. The components are available plain, cross-drilled,
slotted, or cross-drilled and slotted. In a future issue, we'll be upgrading
the original front rotors with cross-drilled and slotted CPP units
(we already installed a set of CPP drop spindles when IF Customs 'bagged
the Suburban), and we will also swap out the rusty master cylinder and brake
booster with a 9-inch CPP combo. |
|
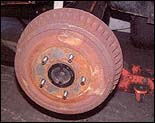 |
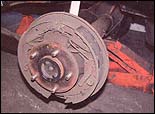
| The 78 rear end we had installed in the Suburban had drum
brakes that were a bit better than the originals, but they were still pretty
outdated. |
|
 |
 |
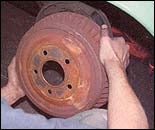
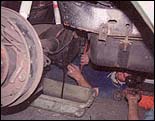
| Luckily for us, the drums came off with little effort. A firm
tug on each side had them off in no time, exposing the antiquated internals,
which looked like they had seen better days. |
|
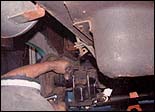 |
| Since the complete drum assemblies are to be removed, including
the backing plates, the brake lines are loosened up and removed. They are
then gently moved out of the way. You don't want to dam- age the hard lines,
as doing so will net you a trip to the auto parts store and some repair
work. |
|
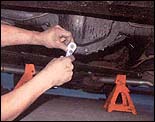 |
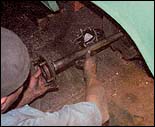
| The rear end inspection cover is next to be unbolted, the
axle shaft retainers must be removed from the differential to allow the
axles to slide out. |
|
 |
| Once the inspection cover is pried loose, the gear oil is
drained. |
|
 |
| With the retaining clips removed, the axles should easily
slide out of the axle housing. |
|
 |
 |
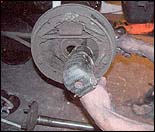
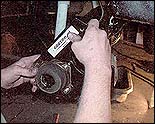
| A quick way to remove the entire brake and bocking plate assem-
blies is to sim- ply unbolt the backing plates and disconnect the emergency
brake cables. Each unit will come off in one big piece. |
|
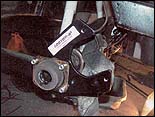 |
| After positioning the new CPP caliper mounting brackets, they
are bolted onto the axle housing flanges. |
|
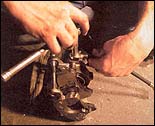 |
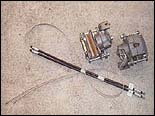
| The brake calipers are now prepared for installation by attaching
the new flexible brake line extensions. |
|
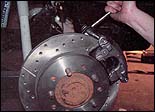 |
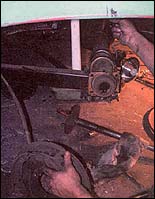
| From here, installing the disc setup moved quickly. The axle
shafts are reinstalled, the new CPP rotors are slid on, and the calipers
are bolted on. |
|
 |
| After attaching the new flexible brake lines to the hard line
and bleeding the brakes, the instal- lation is complete. After heating up
the brakes a few times, we noticed a considerable improvement in braking
and reduced pedal effort, equating into a much more confident driving experience. |
|
|
|

