| Classic Performance Products Borgeson Power
Steering Update |
| 1975 Chevy truck |
| By Rob Fortier |
|
|
| For most people, steering can be broken down quite simply:
power or manual sloppy or tight working or not. Usually, it's not until
that last one that folks start realizing the differences in various steering
I components, especially the effects they have on their truck's performance.
The older I get, the more I appreciate a good power steering setup.
And why not the less effort needed to make my truck turn, the better. But
unlike a manual setup, where my hands were quick to report any possible
problems whether in the box, the suspension, or the tires power assist can
sometimes mask those little indications (at least for me). In the past,
the only time I gave any attention to a power steering system was if I heard
that unforgettable whine or felt any pulsating in the steering wheel. Other
than that, if it was quiet and smooth, it worked. But was it working correctly?
Up until now, I thought it was. |
When I first took my '75 Cheyenne out to California Speedway
to track-test the suspension, our guru test coordinator web manager Nick
Licata quickly commented on how "off" the steering was and its
effect on his slalom course times. Doubting his mechanical knowledge, I
just told him he wasn't familiar enough with my truck, but he strongly disagreed.
From that point on, I began to see what Nick was talking about the steering's
responsiveness (or lack thereof) was not as quick as it should be rather,
it was kind of sloppy. There wasn't excessive play, mind you, it just took
more steering wheel rotation to navigate the truck. This was over a year
ago... things gradually worsened.
Seeing that the rag joint and slip yoke on the column were all but done
with, I called the steering experts at Borgeson Universal to see what they
thought. Instead of replacing the OE components they suggested a trusty
set of splined-to-double-o (DO) joints, especially since I was already using
an ididit column. |
Since I tend to drive the truck more like a sports car at
times, they suggested I swap the old worn out Saginaw box for a quicker
ratio one except they were out of stock at the time. Borgeson steered me
to one of their major dealers, CPP. who just happened to be right down the
street from me, but more importantly, had the Saginaw 800 I needed on the
shelf. With all the components in hand, I set out to make the swap. As it
turned out, the job was easy two hours under the hood before the truck was
back on the road. But what was even more surprising were the results. I
had no idea just how .loose myoid box was until I piloted the truck down
the street for the first time with the quicker-ratio (one full turn quicker
compared to stock) Saginaw installed. Any movement on. the steering wheel
is immediately transmitted through the wheels. With the old box, you'd have
to turn the wheel from 12 to 3 o'clock to get the same results! |
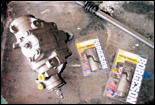 |
| 1...All you need to upgrade your C-10's steering: Saginaw
800 power steering box from CPP, U-joints (1 xDDx1x48 and 3/4xDDx13/16-36),
and a double-o intermediate shaft from Borgeson. The 36-spline joint is
the vibration reducer model, which features a urethane interior designed
to limit the amount of vibration transmitted to the steering wheel. |
|
 |
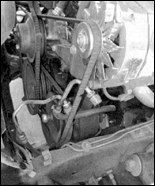
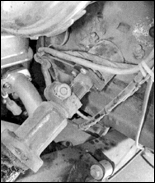
| 2...Up until recently, the old Saginaw seemed to be holding
up decently until someone pointed out the fact that it was pretty loose.
Hey, it wasn't leaking or squeaking, it just took a bit more effort to relay
communication to the wheels than it should have. |
|
 |
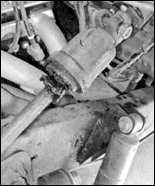
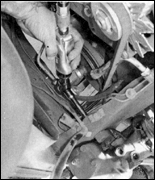
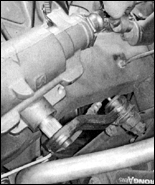
| 3...I'm pretty neutral about rag joints. I've never had a
problem with one in the past, but still, just the fact that the word "rag"
is used in a steering component doesn't sit too well with me. No worries,
it will soon join the real rags leftover from the conversion in the trash. |
|
 |
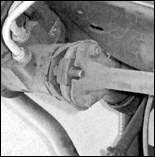
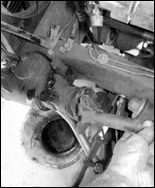
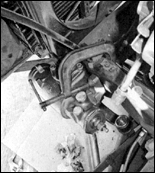
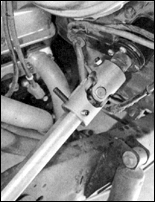
| 4...As for the stock steering column joint, well, here's no
question its time had come and gone quite some time ago at that! |
|
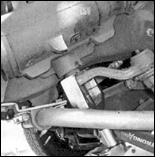 |
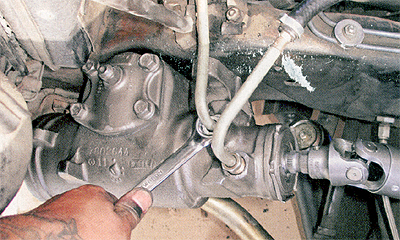
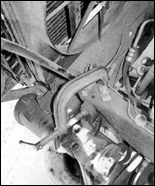
| 5...It doesn't matter if you start the removal process at
the column or the pitman arm I chose the latter, making sure the front wheels
(suspension loaded) were pointed straight forward before pulling the arm
off the box. Typically, the sway bar won't cause interference, but if you're
using low profile frame mounts like me, it might get in the way. |
|
 |
| 6...Assuming your system is "wet," it's not a bad
idea to throw a drip pan, towel, or what have you beneath the box when removing
the power steering hoses. |
|
 |
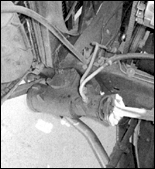
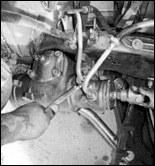
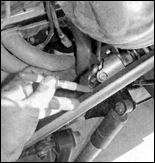
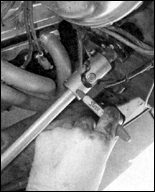
| 7...To keep the remaining fluid in the system and off your
chassis and driveway, cap the lines off and I tuck them aside for the time
being, as shown. |
|
 |
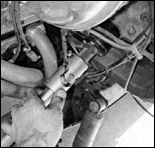
| 8...Continuing on with the removal process, the rag joint
is secured to the box's output shaft with two bolts. |
|
 |
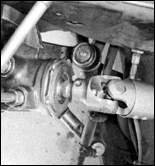
| 9...The upper collar is held in place with a single bolt clamp
once undone, the intermediate shaft can be removed for good. |
|
 |
| 10...Space is tight, so it's probably easiest to undo the
steering box with an air ratchet just make sure to break them loose manually,
unless you enjoy slamming your knuckles real hard! |
|
 |
| 11...If you're going it alone, secure the box to the frame
before removing the last mounting bolt. I did so with a large C-clamp, which
worked perfectly. |
|
 |
| 12...Since the old box was removed with the wheels straight,
I took the new Borgeson joint and centered the output shaft before installing
the new steering box, In doing so, I realized how much difference there
would be when the shaft made one full turn less than the stock one. |
|
 |
| 13...Just as I did during the removal, I used the large C-clamp
to secure the box while I started the bolts from the inside of the framerail.
And speaking of hardware, I used new Grade 8 bolts (threads coated with
anti seize) with new lock washers. |
|
 |
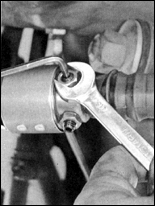
| 14...With the box secured against the frame, the pitman arm
was ready to be installed. If the splines don't line up just right, reach
up and grab the output to manually mesh them with a U-joint. |
|
 |
| 15...If there's any question about your power steering lines
condition, replace them especially the high-pressure line. CPP has kits
available so you don't have to deal with the local parts house headache. |
|
 |
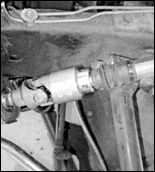
| 16...No more rag-joint, that is. The upgrade U-jolnt from
Borgeson is also a vibration damper, so along with absorbing the shuddering,
it will compensate for chassis flex as well with the absence of the old
slip joint. |
|
 |
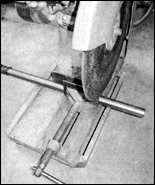
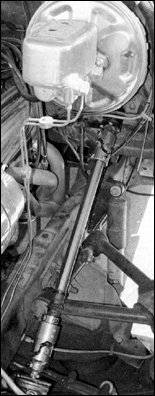
| 17...Borgeson double-0. intermediate shaft. Oversize, it requires
shortening to fit properly. With both U-joints installed, I set the shaft
in the lower joint (where it would end up mounting) and marked the spot
above where it needed to be cut. |
|
 |
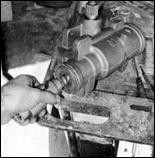
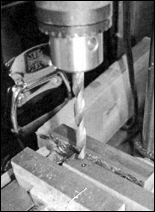
| 18...To keep the cut square and fairly clean, I used my chop
saw. Once cut, I filed the fresh edges down smooth to eliminate any burrs. |
|
 |
| 19...Unlike a setup with varying angles, with the steering
box a straight shot below the steering column, you don't have to worry about
U-joint bind, so no need to keep the intermediate shaft way below the knuckles.
However, that doesn't mean you cram it all the way bottomed out in the joint,
either. |
|
 |
| 20...The same goes for the lower application. On the steering
box's 13/16-36 output shaft, you'll notice the splines are separated by
a recessed groove-make sure the U-joint slips over that, allowing the set
screw to lock fully. |
|
 |
| 21...On the upper U-joint, there's a longer set screw that's
meant to secure the joint through the shaft. |
|
 |
| 22...On the flat side of the D as shown with everything mocked
up where it's going to mount permanently. |
|
 |
| 23...Then drill the shaft, but only through one side, as you
want the set screw to bottom out against the other side's inner wall. |
|
 |
| 24...Make sure every set screw is tightened and locked down
appropriately. After the first 100 miles or so, go back and retighten. |
|
 |
| 25...Once you've got the box connected to the steering column,
fill the system up with fluid. With a dry box, you'll want to fill the reservoir
up and then turn the engine on to cycle fluid through the box. This may
take a few times, but make sure to get it filled properly to avoid any damage.
From there, hit the road and enjoy your rehabilitated steering. |
|
|
|

