| Classic Performance Products |
| Nova Suspension Upgrade Including Lowering and Disc Brakes |
| By Matt Emery |
|
|
Parts List
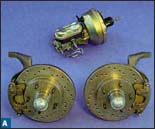 |
| Equipping a Nova with a lowered stance, disc brakes and a
power-assisted master cylinder is as easy as calling Classic Performance
Products. These units come as you see them. They are complete and simply
need to be hung on the control arms. They are available in both stock and
2-inch-drop configurations. The discs are available in smooth, cross-drilled,
grooved or both drilled and grooved. |
|
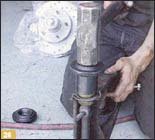
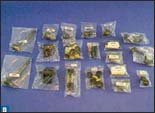 |
| For those who want to retain the stock front suspension system,
but also need to replace the worn-out bushings and bearings, CPP has every
part to do the job. CPP uses advanced compounds like graphite and polyurethane
in its Polypulus bushings. According to the company, they work better than
rubber bushings, last longer and are much less affected by heat and chemicals. |
|
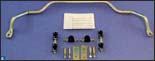 |
| CPP means to do more than simply replace the stock item. This
anti-sway bar is meant to enhance the feel and response of the newly rebuilt
suspension, and is designed with extra duty built right in. |
|
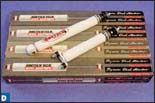 |
| Shocks play a huge role in how a performance suspension performs.
CPP offers these high-quality Doetsch Tech shocks, which have a progressive
design and are designed to work with a lowered suspension system. |
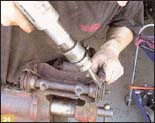
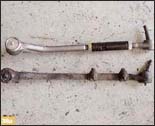
|
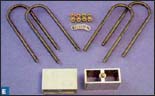 |
| As the rear suspension is made up of leaf springs, all that
was needed was a pair of CPP lowering blocks and longer U-bolts. |
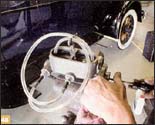
|
|
|
|
How-To
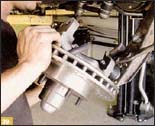
 |
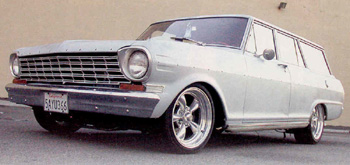
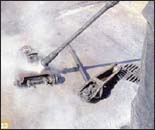
| 1 The last time this Chevy saw new components was in 1964.
The time has come to not only take the look into the new millennium brake-wise,
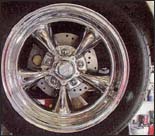
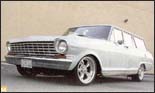
but also to improve the handling characteristics, thanks to the latest in
technological advances in composites and slamming the car to a more appropriate
ride height. |
|
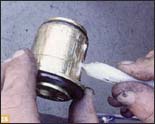
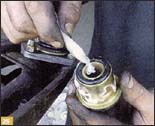
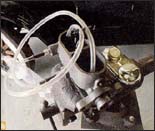
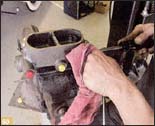
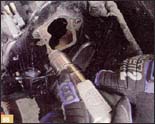
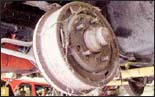 |
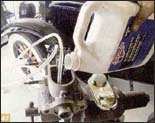
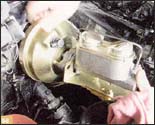
| 2 The drum brakes are one of the biggest drawbacks of any
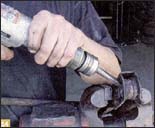
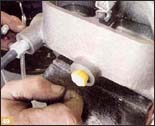
vintage vehicle. Luckily, CPP has made upgrading as easy as changing out
the spindles. |
|
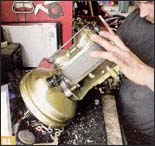
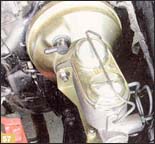
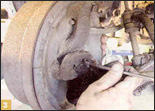 |
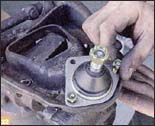
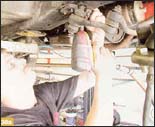
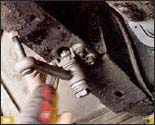
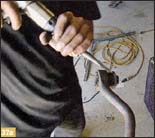
| 3 Disassembly begins with pulling off the old brake assembly.
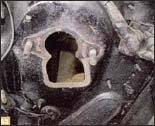
Time is saved by not actually taking the drum or brakes apart, but by simply
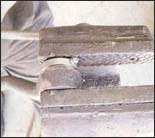
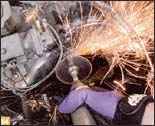
pulling the entire spindle off as a whole. The nuts that hold the spindle
on are removed. |
|
 |
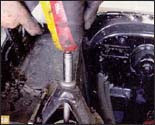
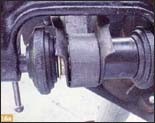
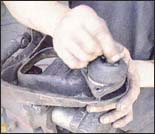
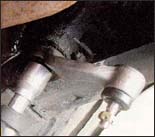
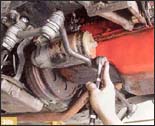
| 4 A sharp rap on the ball joint with a single jack will usually
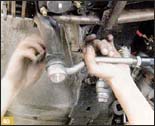
loosen the connection. Notice that the tie rod ends have already been pulled. |
|
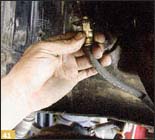
 |
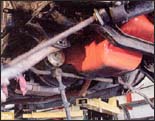
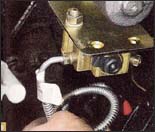
| 5 The entire assembly is lifted off. |
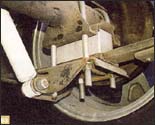
|
 |
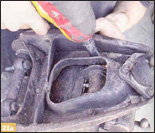
| 6 Everything is pulled off, and most of it will be discarded,
such as the stock anti-sway bar. |
|
 |
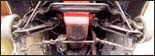
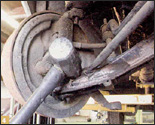
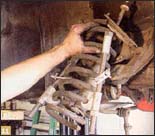
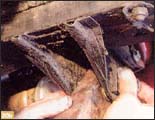
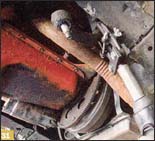
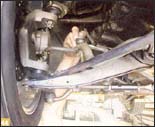
| 7 The lower control arm is a triangulated affair, as it pivots
up and down, and has a strut rod holding it to the leading edge of the frame. |
|
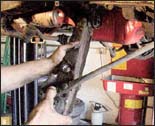 |
| 8 With the mounting hardware removed, the pieces are removed. |
|
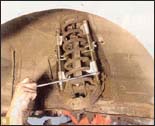 |
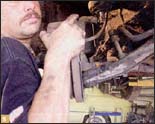
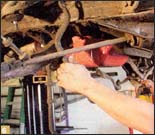
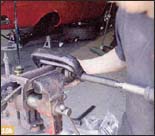
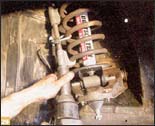
| 9 The upper control arm is where the spring and shock come
into play. Unlike later IFS designs, the Nova had the spring and shock attached
to the upper arm. A spring compressor is used to collapse them enough to
get them out, but note that small U-bolts are used as safety stays. These
are important. If the compressor were to slip off the springs while the
spring is collapsed, it will definitely come apart at a speed high enough
to cause serious damage to whatever may be in the way. |
|
 |
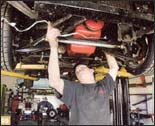
| 10 The upper shock mounts are accessed from under the hood.
Both the upper and lower shock mounts are pulled. |
|
 |
| 11 With the spring collapsed enough, it's separated from the
spring seat and removed. |
|
 |
| 12 With the upper control-arm pivot-shaft hardware removed,
the upper control arm is pulled. This shot also better shows the spring
seat |
|
 |
| 13 About 40 years of grease and gunk are removed from the
arms with a heated pressure washer. Now would be the time to powder-coat
the arms. |
|
 |
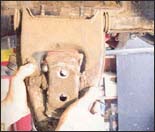
| 14 Getting the lower-control-arm bushing out can be done with
a press or by using an air chisel. Either way, care should be taken not
to damage the arm. |
|
 |
| 15 Lithium grease comes in the Classic Performance kit, and
some is applied to the new bushing before it is pressed in. |
|
 |
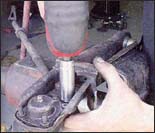
| 16 Virtually the only way to get the new bushings into place
is to use a press. This is a mechanical screw type; another is with a hydraulic
press. |
|
 |
| 17 What would a front-end rebuild be without a new set of
ball joints? CPP has ones to fit literally every classic Chevy car or truck.
The stock ones are held in place with bolts, so they are easily removed. |
|
 |
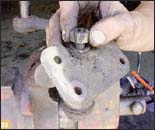
| 18 The arms should be fully inspected before installing the
new joints. This is especially true of the opening where the ball joint
sits. |
|
 |
| 19 The new joint is held in place with high-quality hardware
supplied by CPP. |
|
 |
| 20 With new bushings installed onto the strut rod, the lower
control arm is installed. The strut rod bushings are important, as the strut
rod is what determines the wheel caster. Worn bushings will cause the wheel
to vibrate forward and back. |
|
 |
| 21 On to the lower arm, the spring seat and ball joint are
removed. |
|
 |
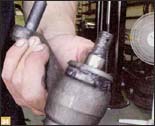
| 22 A new ball joint is installed. |
|
 |
| 23 So is a new spring perch. They both simply bolt on. |
|
 |
| 24 The air chisel is again used to drive out the bushings. |
|
 |
| 25 A coating of lithium grease is applied to the new bushings
before installation. |
|
 |
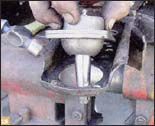
| 26 The bushings are driven in with a single jack and a collar. |
|
 |
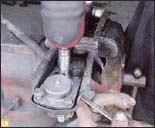
| 27 Care was taken to get the pivot shaft clocked into the
right position before the end nuts were tightened. |
|
 |
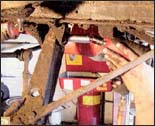
| 28 With the upper control arm in place, the spring was collapsed.
The new Doetsch Tech shock fed up through it and was set into position. |
|
 |
| 29 Note that the spring was not entirely collapsed, but only
enough to get started in place. Being a V-8 spring, it had a higher rate
than one for a straight-6 engine. It was a delicate operation, and one that
entailed collapsing the spring slightly, pushing and prying, collapsing
a little more, followed by more pushing and prying. This is the most dangerous
part of the job, so take your time. |
|
 |
| 30 The one piece left from the stock steering system will
be the relay rod; everything else will go or be rebuilt. That includes the
idler arm and the Pitman. |
|
 |
| 31 A puller is required to get the Pitman arm loose. |
|
 |
| 32 The new CPP unit is installed. |
|
 |
| 33 The stock idler arm actually has two bushings, one at each
end. Both are removed and the arm is cleaned and inspected. |
|
 |
| 34 Rather than use a copy of the stock rubber-based bushing,
CPP changed to a design that incorporates roller bearings, which makes it
easier to spin the steering wheel. Thus, steering will be much more fluid. |
|
 |
| 35 The idler arm is reinstalled. |
|
 |
| 36 The old tie-rod ends are removed from the relay rod. |
|
 |
| 37 The bushings at the ends of the relay rod also get the
new CPP roller bearings. |
|
 |
| 38 New tie rods are part of the package, of course. Again,
CPP upgrades the units with an adjustment sleeve that uses locknuts. These
are much easier to use, stronger and more precise than the stock items. |
|
 |
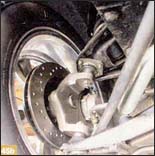
| 39 Time to install the new dropped-spindles/disc-brake assembly.
And this is how it came-assembled, greased, loaded with brake pads and ready
to install. |
|
 |
| 40 The tie rods are attached. |
|
 |
| 41 New rubber brake lines come with the CPP kit, but know
that it also offers a set of braided lines that look killer. |
|
 |
| 42 For this customer, there was no question that the wagon
would be equipped with American Torq- Thrust II wheels. These front units
are 16s, while the rears are 17-inches tall. The classic look of the five-spoke
wheels is enhanced with the low-profile, 3D-series BFGoodrich g-Force KDW
rubber |
|
 |
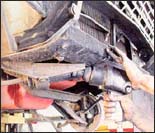
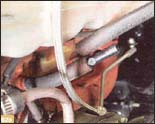
| 43 Last but not least is the new CPP anti-sway bar. |
|
 |
| 44 To make this an easy install, the mounting points for the
new (though much larger) CPP unit are the same as the stock locations. |
|
 |
| 45 That quickly, the front end is now ready to roll another
50,000 miles. The disc brakes are state of the art, and the firm action
of the steering has been vastly improved. And unlike installing an IFS clip,
no sheetmetal needed to be pulled, let alone the engine and transmission. |
|
 |
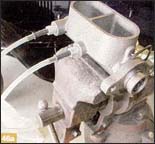
| 46 One of the high points of brake system safety evolution
is the twin-chamber master cylinder design. The Nova had come stock with
a glorified fruit jar (single-chamber) master cylinder that fed all four
wheels. That means if line pressure is lost, no wheel will have pressure.
With the twin-chamber design, at least one pair of wheels will stop. A master
cylinder does need to be primed, however. Tubes running from the outputs
are run back into the chambers |
|
 |
| 47 Brake fluid is poured into the chambers. |
|
 |
| 48 A Phillips head screwdriver is used as a push rod to force
all of the air from the internal system. |
|
 |
| 49 The plastic plugs are reinstalled. |
|
 |
| 50 More plunging shows no bubbles, so the cylinder is ready. |
|
 |
| 51 The master cylinder is installed onto the CPP power-assist
unit. |
|
 |
| 52 The stock, one-chamber, non-power-assisted master is removed
and tossed. |
|
 |
| 53 A pair of mounting posts remain, however. These must be
removed before the new unit can be installed. |
|
 |
| 54 A cut-off blade makes quick work of the posts. |
|
 |
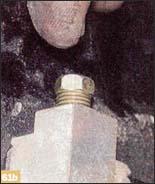
| 55 The remaining bolt is drilled out. |
|
 |
| 56 The new CPP master cylinder is installed into the opening
with its mounting posts going into the holes of the drilled-out stock posts. |
|
 |
| 57 Now the CPP master cylinder is in and ready to be plumbed.
Everything about upgrading vintage vehicles should be this easy! |
|
 |
| 58 As with everything else. CPP had all of the right parts
to plumb the now two-line system. |
|
 |
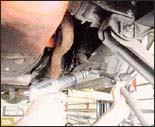
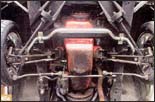
| 59 This particular pre-bent line runs beneath the engine via
the crossmember and will connect to the old line to pressurize the rear
brakes. |
|
 |
| 60 It is held in place by these rubber-lined clips. |
|

 |
| 61 Remember the stock system was completely integrated? Well,
this is where the line to the rear brakes split from the front line. To
make this the front-only line, the line to the rear brakes is pulled and
a plug inserted. |
|
 |
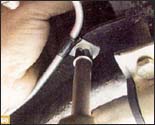
| 62 A vacuum line running from the positive crankcase ventilation
hose (intake manifold to valve cover) to the check valve provides the "power"
in the power-assisted master cylinder. |
|
 |
| 63 Adding CPP lowering blocks onto the rear leaf springs will
easily and inexpensively lower the rear of the Nova to match the lowered
stance of the front end. |
|
 |
64 With that, the job is done. Thanks to CPP and American
Racing wheels, this Nova looks and drives great, and stops exceptionally
well. While many enthusiasts consider an IFS clip to be a better upgrade,
rebuilding the stock suspension components
was done for less than half the cost, one-third the hassle, and will provide
great service until the time is eventually right for the front-clip upgrade. |
|
|
|
| Classic Performance Products 378 E Orangethorpe
Ave., Placentia CA 92870 Tech Line 714-522-2000 |
 |
TECH
| BOOKS | SUSPENSION
| BRAKES | STEERING | CONTACT
US | HOT PRODUCTS |

|
| © Classic Performance Products. This "website"
and all contents are property of Classic Performance Products.
Prices subject to change without notice. Not responsible for
errors or omissions. Please note that kits & prices
may vary between certain applications. |
|
|
|
|
|
|
|