 |
| Have a V-8 |
| Swapping Engines Is Easy With Crossmembers
From Classic Performance Products |
| By Damon Lee |
|
|
|
A Chevy engine in a Ford truck!? Hey, don't act so
surprised and disgusted. The small-block Chevy has become a ubiquitous street
rod engine, and there are some good reasons for that. Besides being light
and compact, the small-block Chevy makes good power and is simple and convenient.
You can find parts for one anywhere, and a monkey can rebuild one with a
crescent wrench. Simply put, it's an easy affordable choice.
In all honesty, however,. this story really isn't about putting a Chevy
engine in a Ford truck. It's about putting any number otV-8 engines in any
number of vintage straight-axle trucks. You see, Cassic Performance Products
builds these nifty engine and transmission crossmembers for Ford and Chevy
trucks from the late-'40s through the '50s (up through '64 for most Fords). |
The transmission crossmembers are basically universal, while
the engine crossmembers are available for a variety of power plants including
small and big-block Chevys and many different Ford mills (289/351W, 351C/400M,
352/428, and 429/460). And since the tubular crossmembers use slip-fit collars
to mount to the framerails, they can be adjusted and tailored to fit a wide
range of trucks, pretty much anything using a beam-axle and ladder-type
frame with rails no farther than 38 inches apart is a likely candidate.
You'd be surprised at how many '40s, '50s, and '60s trucks fall into these
parameters. We recently had the chance to witness Alan Crouse putting these
crossmembers to use on CPP's '56 F-l00 project truck. Ford fanatics may
wince at the sight of him lowering a small-block Chevy between those Blue-Oval
rails, but take heart-you could use similar crossmembers to put a 460 in
a '55 Chevy (in fact, we dare you to do that). Check it out and see
what you think. |
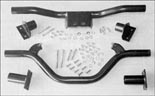 |
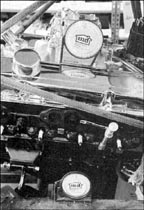
| 1. The CPP engine (bottom) and transmission (top) crossmembers
are available for a variety of Ford and Chevy V-8s and trannys. They come
powdercoated and include all necessary hardware. |
|
 |
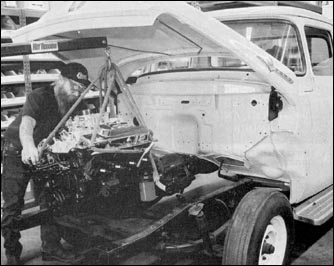
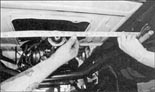
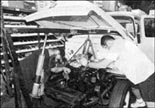
| 2. For better access, Alan has Ryan Smith help him lift the
front sheetmetal off the F-100. |
|
 |
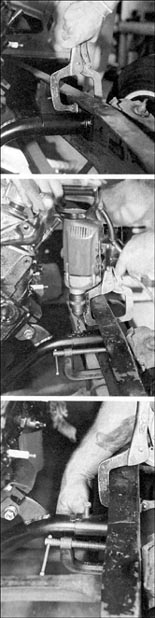
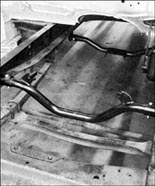
| 3. After sliding the end collars over the main tube, Alan
positions the engine crossmember on the frame. Here nothing needs to be
welded or bolted because the crossmember ends will rest on the frame's lower
channel as the engine is positioned. Alan takes an educated guess on how
far forward the crossmember will need to be (this will be adjusted as needed). |
|
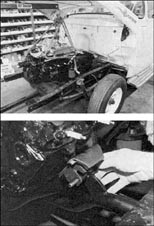 |
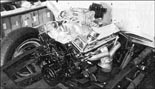
| 4. The engine is then lowered into the truck and bolted to
the crossmember. Alan lets most of the engine's weight settle down onto
the crossmember, but keeps the hoist connected for extra support. At this
point you can determine whether the engine needs to be slid forward or back,
making sure to consider factors such as distributor-to-firewall clearance
and engine-to-radiator fit. |
|
 |
| 5. At this point you'll also want to mock the transmission
cross member in place. Welding clamps or C-clamps work well to temporarily
hold it in place. |
|
 |
 |
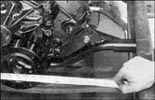
| 6. While they're under the truck, Alan and Ryan center the
transmission between the framerails. Sliding the crossmember side to side
in the end collars makes it easy to adjust. They also mark the frame where
it will need to be drilled for mounting bolts. |
|
 |
| 7. Obviously, the engine also needs to be centered from side
to side in the same manner. |
|
 |
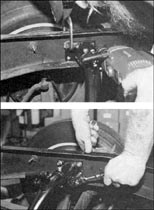
| 8. An important consideration is the angle on which the engine
is mounted. CPP recommends a 4-degree downward position (transmission tailshaft
lower than the crankshaft snout), paired with a rearend pinion angle that's
2-3 degrees upward when the vehicle is static. This allows for 1-2 degrees
of rearend deflection under load, which will properly line up the pinion
and tailshaft. Alan uses a magnetic level on the valve cover to check the
angle. The crossmember can be rotated slightly inside the end collars for
adjustment. Generally, the proper engine angle will put the carburetor mounting
pad parallel with the ground. |
|
 |
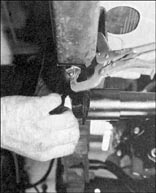
| 9. After getting the engine angle set, Alan clamps the end
collars to the frame and drills a hole through the collars and crossmember.
Bolts secured through these holes will keep the crossmember from rotating
or shifting inside the collars. (The collars can also be welded to the crossmember.)
The same thing is done on the transmission crossmember. |
|
 |
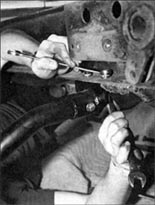
| 10. Though it's not really necessary, Alan removes the engine
and trans at this point so he has more room to work while drilling holes
and mounting the crossmember to the frame. Four bolts hold each end collar
to the framerail. |
|
 |
11. Likewise, the transmission crossmember is secured to the
bottom channels of the framerails using two bolts on
each side. |
|
 |
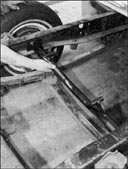
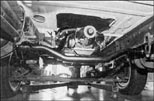
| 12. Here's what the installed crossmembers lool like, clean,
simple and effective |
|
 |
| 13. With a little help from CPP owner Jim Ries, Alan maneuvers
the engine and transmission back in one final time. |
|
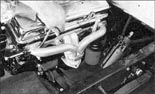 |
| 14. Anticipating clearance problems, Jim ordered a set of
Sanderson's compact headers (PN CC134) for the project. As it turns out,
there's more space than he initially thought, although the coated headers
still provide a clean, compact exhaust option. You'll also note that the
F-100 has been upgraded with one of CPP's power steering kits utilizing
a Toyota 4x4 power-steering box. |
|
 |
| 15. Hey, it's in! After just a few hours' work, the small-block
fits snug and sound between the F-100's framerails. Who said V-8 conversions
had to be difficult? |
|
 |
| It's always best to have shop and assembly manuals on hand
to make sure your installation is correct and to make the project as easy
as possible. We recommend factory manuals, available at Greg's
Automotive |
|
|
|

