 |
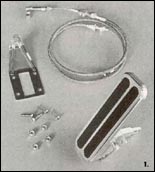
| 1. The Eliminator pedal kit includes the pedal and all necessary
mounting equipment; we had to buy a Lokar throttle cable separately. Lokar
suggests using a 36-inch throttle cable for most floor-mounted applications. |
|
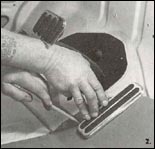 |
| 2. Finding a proper mounting position is probably the most
critical part of the installation. We suggest sitting in the driver's seat
and finding a spot that will be comfortable for long-term driving. You'll
also want to check under the floor to make sure there aren't any obstructions.
Once you've found the spot, lay the pedal flat on the floor and mark its
position. |
|
 |
| 3. Using the cable bracket as a template (locating
it 3/4-inch up from the bottom of the pedal), Alan marked the floor where
it needed to be drilled and cut. |
|
 |
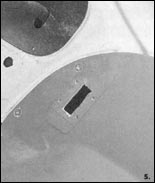 |
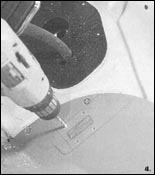
| 4-5. The four mounting holes then need to be
drilled, and the center opening cut out. The aftermarket access panel on
this truck was fiberglass, which made the process a little easier. |
|
|
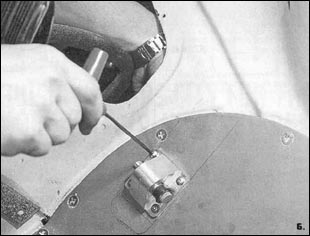 |
| 6. The pedal's mounting base could then be bolted on.
The same fasteners also held the cable bracket in place under the floor. |
|
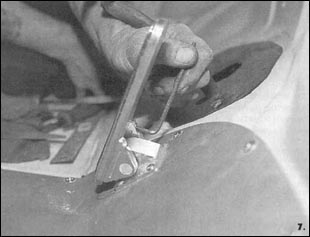 |
| 7. The splined side plates slid onto the pivot shaft, and
then the pedal was attached with four Allen screws. |
|
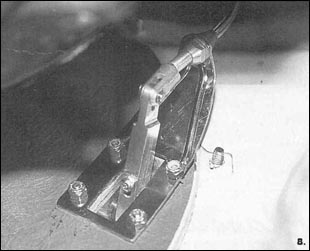 |
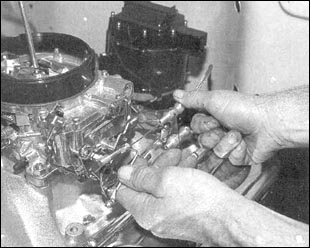
| 8. It was then time to move underneath and into the engine
compartment. The Lokar throttle cable was attached to the bracket as shown
here. |
|
 |
| 9. Then it could be trimmed to a proper length and hooked
up to the carburetor or fuel injection in standard fashion. Follow the instructions
for adjustments and fine-tuning, and you'll have a pedal and throttle cable
assembly that works great and looks sharp. |
|
 |
| It's always best to have shop and assembly manuals on hand
to make sure your installation is correct and to make the project as easy
as possible. We recommend factory manuals, available at Greg's
Automotive |
|
|