 |
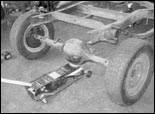
| Now we'll get the 9-inch up to par. This particular one came
from a '57-60 Effie, which was when the 9-inch was introduced in place of
the aging Dana. |
|
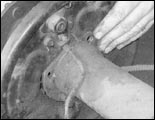 |
| Jim wanted his wheels to be the same bolt pattern front and
rear, so we needed to red rill the stock 5-on-51/2 axles to match the 5-on-5
bolt pattern from the upgraded disc brakes already up front. The first step
was pulling off the drum and all of the brake hardware. Then the four retaining
bolts were loosened and removed. |
|
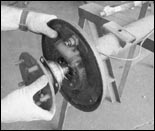 |
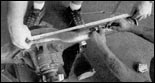
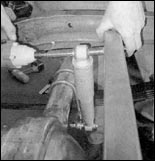
| The axles were then pulled out as Jim held the backing plate
in place. |
|
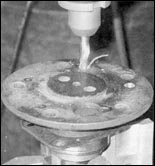 |
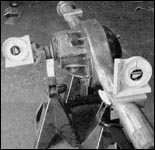
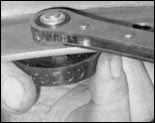
Jim brought the axles to his machinist, who locked the
axles into his computer-controlled drill press and carefully drilled the
new holes using a 33/64-inch drill bit to accommodate the new
1/2-inch lugs. |
|
 |
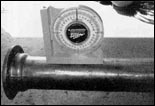
| It's very important that these holes are drilled exactly right.
Check out the equipment that is used. The measurements are pinpointed to
ten-thousandths of an inch. Unless your drill press can do that, we'd suggest
not trying this at home. |
|
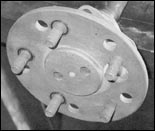 |
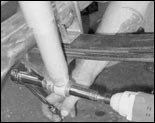
| The axles were cleaned up, and the studs were pressed in.
We fit each axle with a new rotor to make sure the studs were in straight. |
|
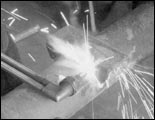 |
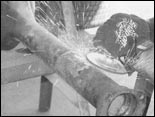
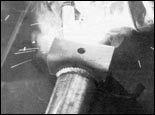
| With the axles done, we moved on to the housing. Jim cut the
old spring pads from the top of the housing off with a cutting torch. If
you're not so inclined, you can use a cutoff wheel or reciprocating saw. |
|
 |
| Jim finished cleaning the residual weld from the area by alternating
between a 4-inch grinder with a 50-grit flap disc and the wire wheel. |
|
 |
| The location of where to weld the new springs pads to the
housing tubes was determined by setting the axle housing in place and measuring
according to the directions supplied in the kit-making sure that the rearend
was in even side to side. Jim also test-fitted the new shock cross member
and drilled out the holes to 7/16 inch. |
|
 |
| Alan and Jim double-checked the placement of the spring pads
by measuring from the axle centerline to the outer edges. Since these measurements
were dead on with the first ones, we figured they were in the right spot. |
|
 |
| Once the side-to-side measurement was set, the pads must be
positioned five degrees down from the pinion. The housing was set on jackstands
and leveled. |
|
 |
| The pinion was set at the required five degrees down, and
the pads were set at zero. We marked it to be safe, and Jim tacked it before
it had the chance to move. |
|
 |
| Once everything was double checked, the spring pads were welded
solid to the housing with a MIG welder. |
|
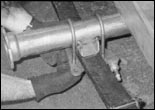 |
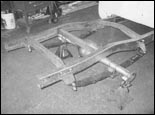
| The 9-inch was set into place and bolted in using the U- bolts
and spring plates. |
|
 |
| The 7/16-inch bolt that held the shock cross- member was tightened
down. |
|
 |
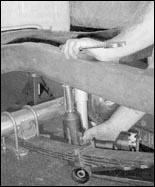
| Alan buzzed the shocks onto the upper shock mounts using the
supplied spacers... |
|
 |
| .. .followed by the lower mounts. which are incorporated into
the lower spring plate. |
|
 |
| Alan then drilled a hole in each framerail directly above
the axle housing and mounted the new polyurethane bumpstops. |
|
 |
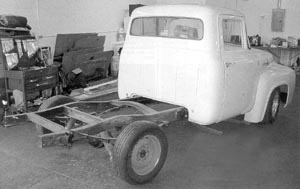
| The old truck is starting to look petty good now. Next month
we'll install the axles and disc brakes, along with new lines and e-brake
cables. And we have a few surprises alter that. So stay tuned! |
|