| Classic Performance Products |
| Installs Their New Effie Gas Tank |
| By Jeremy Cook |
|
|
|
In February, we began covering the buildup of a '56 F-100
belonging to Classic Performance Products. The crew started by hanging new
leaves as well as a new cross member and shocks. A Ford 9-inch axle from
a '57-60 truck was then mated up and redrilled to match the 5-on 5-inch
bolt pattern up front.
Last month, we installed a complete CPP rear disc kit-including new lines
and E-brake cables.
Just as we hinted at last month, the next item on the to-do list was to
add in the fuel system. Mysteriously, the truck was purchased with the stock
tank removed from behind the seat, yet no provisions were made for a replacement
no problem for Jim and the crew, since one of CPP's newest part numbers
is an aluminum gas tank made specifically for the '53-56 F-100s. |
Actually, there are a total of six different tanks available.
There's a tank that is contoured to bolt into a truck with the stock cross
member and notched for the factory leaf-spring hangers. Also available is
a tank without the notches on the flanges for trucks running later leaf
springs or a four-link but still use the factory rear cross member. Finally,
there is the tank without the notches or the cutout if the rear cross member
has been relocated. This tank sports a 21-gallon capacity while the replacement
tanks top off at 19 gallons. The super-strong tanks have an all-aluminum
construction; the tanks themselves are made from US-inch plate and the mounting
brackets are 3/16-inch thick. |
You also have your choice of fuel fillers. A standard neck
and cap can be attached directly to the tank, and it can be accessed by
a door in the bed floor. The other option is to mount a marine-style cap
onto the bed floor and connect the two with the supplied hose. Either way,
there are several choices available to get the look you want, and many of
them are available through CPP.
Follow along as Allen makes the install look even easier than it is, and,
as always, CPP with any questions you might have on the new line of gas
tanks or any brake, steering, or suspension product they carry. |
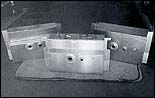 |
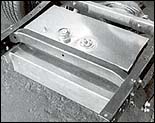
| There are actually three different tanks available for the
'53-56 F-100. This '56 has new leaves and hangers, but it still has the
stock crossmember-so we're using the one on the left. Each has mounting
flanges that follow the contour of the Effie frame, and each is available
with either style of filler neck-one for a standard cap and one for flush-mounting. |
|
 |
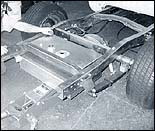
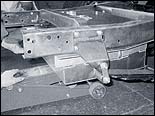
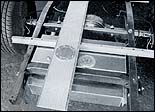
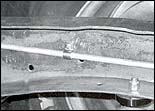
| Like most trucks, the only area with space for a gas tank
is between the framerails behind the axle. Jim opted to leave the stock
rear crossmember, but if you need the extra two gallons of fuel capacity,
you can move it farther back or even replace it with 2x4-inch box tubing. |
|
 |
| Using a towel to protect the aluminum, a floor jack is used
to test-fit the tank. |
|
 |
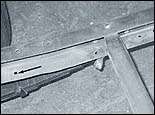
| The tank stops when the flange contacts the new spring hanger.
Only in this instance is trimming required. |
|
 |
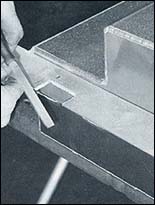
| Allen marked the area to be cut, dropped the tank, and squared
up the lines. |
|
 |
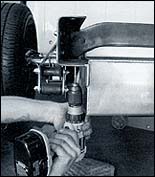
| A cutoff wheel was used to trim off the area. It's a little
easier if you drill the corners first, but Allen's been doing this for a
while. |
|
 |
| The notch was cleaned up with a file and dusted off. |
|
 |
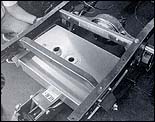
| Allen jacked the tank back into place. The mounting flange
matched the contour perfectly, and there was adequate clearance between
both of the crossmembers. |
|
 |
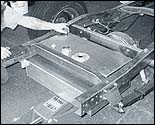
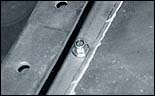
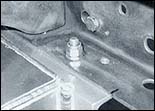
| Three bolts fasten the tank to the frame on each side. The
farthest-forward existing bolt hole (arrow) was used, but the other two
would have to be drilled. |
|
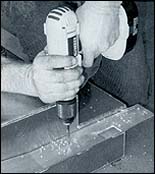 |
| The three holes were drilled in the tank- one to match the
hole in the frame and the other two equal distances apart. |
|
 |
| With the tank jacked into place for the last time, the front
bolts were installed finger-tight. |
|
 |
| And then the remaining two holes on each side were drilled. |
|
 |
| Now the remaining four bolts were installed and all six were
tightened down. |
|
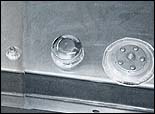 |
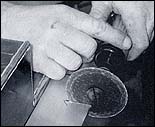
| In addition to the gas cap (which in this case is simplae
chrome vented cap), there is also a sending unit and a vent fitting. Since
we're using vented cap, the vent fitting was simply pluged. The feul sender
cames with the tank and simply bolts in. The float just needed to be trimmed
and placed on the sender before installating. |
|
 |
 |
| This is the gas door that Jim is using. It will be flushed mounted onto
the the center of the bed slat. It's available as an option with any CPP
tank. |
|
 |
| A new fuel line was bent up and installed at this time. The
90-degree fitting was threaded into the tank after the appropriate bends
were made. |
|
 |
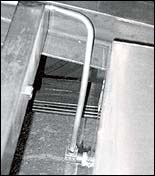
| The line is held in place with Kugel clamps about every two
feet until the line ends up near the fuel pump. |
|
 |
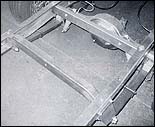
| There you have it. The rear of this Effie is now ready for
the new bed. |
|
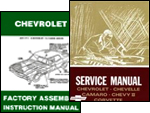 |
| It's always best to have shop and assembly manuals on hand
to make sure your installation is correct and to make the project as easy
as possible. We recommend factory manuals, available at Greg's
Automotive |
|
|
|
| Classic Performance Products 378 E Orangethorpe
Ave., Placentia CA 92870 Tech Line 714-522-2000 |
 |
TECH
| BOOKS | SUSPENSION
| BRAKES | STEERING | CONTACT
US | HOT PRODUCTS |

|
| © Classic Performance Products. This "website"
and all contents are property of Classic Performance Products.
Prices subject to change without notice. Not responsible for
errors or omissions. Please note that kits & prices
may vary between certain applications. |
|
|
|
|
|
|
|