 |
| Classic Performance Products makes it easy
to steer your |
| 1972 Chevrolet C-10 - Simple C-10 Solutions
- Rearend Refresh |
| By Grant Peterson |
|
|
|
Why is it always the little things? They seem to be able
to make or break just about anything in life, from trucks, taxes, to the
opposite sex, but let's just stick to trucks here. Last month we showed
what it takes to rebuild a GM 12-bolt truck rearend, which is definitely
one of the bigger activities one could do when it comes to wrenching on
a truck. Along with this job there are a few small yet potentially difficult
tasks that need to be addressed, especially when you're reinstalling that
nice new rearend in your old truck/work in progress.
Father Time and Mother Nature are always two forces we
deal with when working on older vehicles, and more often than not neither
one has been too kind to the automobile. Simply removing the rearend from
our '72 Chevy C-10 should be relatively easy, but mix in many years spent
out in the elements and something simple can become quite frustrating, like
removing the well-rusted nuts on the U-bolts that hold the rearend to the
trailing arms. |
Some form of heat was definitely in order, and the cutoff
wheel was looking even better at one point. Even if you don't have to resort
to such brute methods of removal, there are still a handful of questions
that need to be answered, like how do you get the old hardware looking good
again? While you're under there, you notice the shocks' steep forward angle
since lowering your truck-how do you fix that? Say you want to put a diff
cover on that freshly rebuilt rearend that holds an extra quart of gear
oil, only to find that it hits the stock Panhard bar. In today's world,
where more old trucks are put on the road and expected to keep up with modern
vehicles versus restorations, these become real problems. |
Any one of these situations can be solved on its own depending
on your situation, or done all at once, which would be easier in the long
run. They all can be done at home in the garage or driveway if need be.
Read on for the answers to these questions and how to keep the little things
from becoming big problems, and how to get the most performance out of your
truck! |
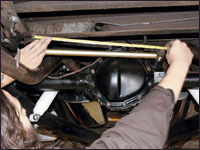 |
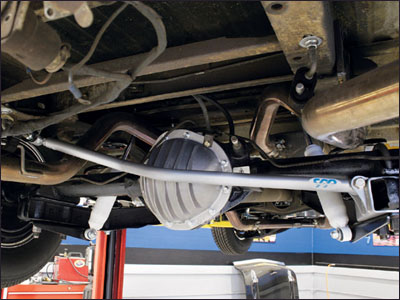
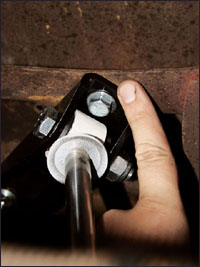
| 1. Before getting too carried away, we measured from the frame
to the rearend Panhard bar mount for later reference to make sure the rearend
stayed centered after it was all said and done. Since the stock Panhard
bar's bushings were shot, it was easier to replace the whole bar with CPP's
adjustable Trac Bar. More on this in a bit. |
|
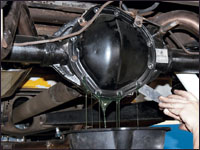 |
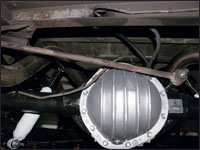
| 2. Since last month we followed the break-in procedure and
logged enough miles to necessitate a gear oil change in the rearend. Unfortunately,
the stock truck 12-bolt doesn't have a drain plug, so the easiest way to
drain it was to remove the differential cover. |
|
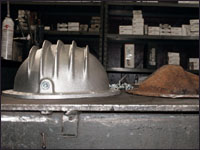 |
| 3. During the first attempt to use PML's cast-aluminum extra-capacity
diff cover, we ran into one problem that is easy to see here: the PML cover
is obviously much deeper and hangs farther off the back of the rearend and
hits the Panhard bar.... |
|
 |
| 4. In a truck with parallel leaf springs and no Panhard bar,
this wouldn't be an issue, but on a lowered truck with trailing arms like
our '72, it's a major problem. |
|
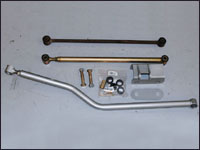 |
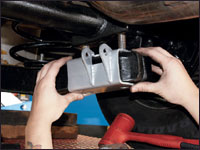
| 5. We took our dilemma to the forward thinkers at CPP, and
through a bit of in-house R&D they came up with a solution. From the
top to the bottom: the stock piece; the CPP adjustable Trac Bar; and their
adaptation of their own 36-inch Deluxe Trac Bar that mounts in the same
location on the frame as the stock one, but uses a bracket that goes on
the passenger-side trailing arm. CPP's Deluxe Trac Bar is ideal for trucks
that have been lowered 4 inches or more in the rear, because it lessens
the rearend's side to side movement when the suspension travels compared
to the stock Panhard bar, plus they bent this one to clear the PML cover
so we can kill two birds with one stone. |
|
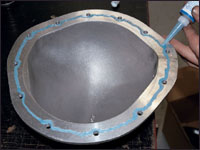 |
| 6. With the old diff cover off and the gasket surface cleaned
up, use a good-quality RTV gasket sealant and apply a bead to the cover
that passes on the inside of the bolt holes like so. |
|
 |
| 7. After installing a new gasket and the new bolts provided
by PML, tighten and torque them down in a criss-cross pattern to 15 ft-lb. |
|
 |
| 8. Next, the CPP Deluxe Trac Bar bracket goes on the passenger-side
trailing arm. The lower shock mount needs to be removed, and the U-bolt
needs to be raised up enough to slip the top of the Deluxe Trac Bar bracket
between the rearend and the trailing arm. |
|
 |
| 9. The Deluxe Trac Bar kit includes a spacer for the driver's
side to raise the left side of the rearend up the thickness of the Trac
Bar bracket on the right, and is installed the same way. |
|
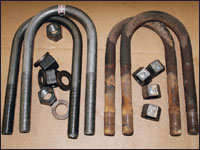 |
| 10. More than likely, if your truck has its original rearend
in it, your U-bolts will look like the stock ones on the right that were
more than a struggle to remove. Not only can the nuts be difficult to remove,
but once you do get them off, about 4 inches of the U-bolts pass through
the trailing arms, and after all these years of trapping dirt and water,
they have nicely rusted to one another. You can see how the originals taper
in now where all the rust has been chipped off. Well, CPP has just the cure
in both stock and extended replacement U-bolts like the ones on the left. |
|
 |
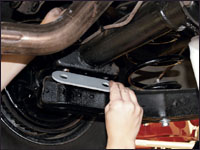
| 11. As mentioned before, the Deluxe Trac Bar mounts in the
stock bracket on the bottom of the driver-side framerail, while the right
side now mounts on the trailing arm. In a stock diff cover situation, the
Deluxe Trac Bar would be straight, but CPP put the right bends in this one
that clears the PML cover. |
|
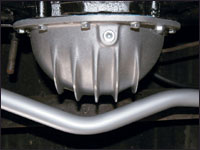 |
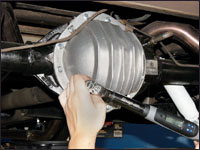
| 12. From below, we can see there is ample clearance between
the deep PML cover and the Trac Bar. Notice the handy drain plug in the
diff cover. |
|
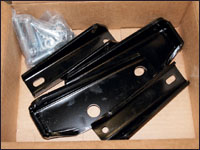 |
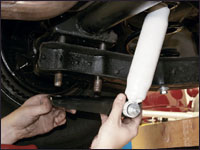
| 13. To help finish off the rearend refresh once and for all,
we also picked up CPP's rear shock relocation kit. When you lower the rear
of the '67-72 Chevys, the rear shock angle become too steep, and this kit
helps correct it. |
|
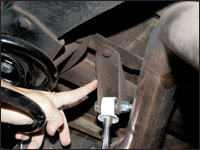 |
| 14. The trickiest part of installing the shock relocation
kit is removing the stock upper shock mounts, which are riveted to a crossmember.
Use a drill, air chisel, or whatever your preferred method is, but just
be careful. |
|
 |
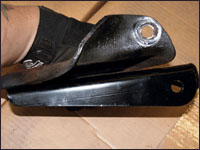
| 15. The new upper mounts bolt into the stock rivet holes and
come complete with hardware. Just be sure to install the bolt next to the
shock from the bottom or the bolt will hang down and prevent the shock from
going into place. |
|
 |
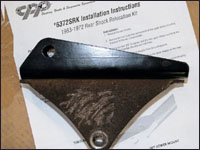
| 16. The CPP lower shock mounts do the same as the top, but
in the opposite direction. They move the bottom of the shock forward another
inch or so. |
|
 |
| 17. The new upper mounts bolt into the stock rivet holes and
come complete with hardware. Just be sure to install the bolt next to the
shock from the bottom or the bolt will hang down and prevent the shock from
going into place. |
|
 |
| 18. Because all these related pieces needed to come apart
to install the Deluxe Trac Bar kit, it makes it a perfect time to install
the new U-bolts and rear shock relocation kit. The lower shock mounts go
in the stock location under the trailing arms, with the shocks facing forward. |
|
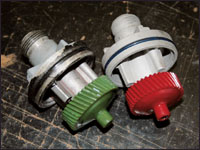 |
| 19. Last month, Unitrax changed the ring-and-pinion ratio
in the 12-bolt from a 3.73:1 to a 3.42:1 with parts from Randy's Ring &
Pinion during its rebuild. This meant the speedometer had to be recalibrated
since it was reading 10-15 mph slow. This seemed like it would be a fairly
easy thing to accomplish since all that needs to be replaced is the speedometer
drive gear in the transmission that's easily accessible. Well, I soon found
out the local transmission shops won't sell parts, and trying to tell the
kid at the big auto parts chain store that I have a '72 C-10 with a 4L60
tranny in it and I just need a speedo gear was futile. Then the light went
on-we got the transmission from Gear Star; we'll call them. We told them
the tranny, rearend ratio, and rear tire size, and that we had a 42-tooth
speedo gear in there now, and they figured out that we needed to swap it
out for one with 37 teeth. |
|
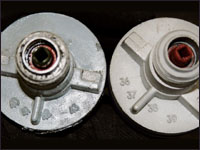 |
| 20. Along with the new 37-tooth speedo drive gear, Gear Star
also had the housing to match. There are numbers on the outside of each
housing that show which gears they can be used for, and it's important to
make sure they correspond properly. The one on the left came out of our
tranny and is good for 43-40 tooth gears, while the new one handles 39-36
tooth gears. |
|
|

