Classic Truck Power Steering for 1960-1966 Chevy and GMC
Pickup Trucks
|
|
 |
|
- Classic Performance Products
- Adds
- Power Steering for your '60-'66
Chevy/GMC Truck
- The new Classic Performance Products' power steering
kit for 1960-'66 Chevy trucks provides the needed mounting hardware for
you to install a 1969-'87 2wd, Chevy truck power steering gearbox. The
finished assembly is geometrically proper and works just like a late-model
truck.
|
If you are an owner of a 1960-'66 Chevy truck, you probably
have wondered, at some time or another, what it would be like to have power
steering. Of course, the hard-core custom truck fabricator will always
be able to design something that will work using any number of products.
But, something like that is indirect and more of a personal touch. There
have been a few folks who have made attempts to create a good kit that
will provide 1960-'66 Chevy truck owners with power steering using GM parts.
But, no one could come up with a kit that was as simple as one-two-three
to install, as well as being engineered properly and safely. Classic Performance
Products' new power steering kit is definitely what you 1960-'66 Chevy
truck owners have been looking for. It is very easy to install in a short
amount of time. Besides being geometrically correct, the kit also installs
a little backbone other kits don't offer by providing a backing plate that
installs on the inside of the frame.
|
Well, as you would expect, the engineering minds at Classic
Performance Products have designed, engineered, tested and are now producing
a 1960-'66 Chevy truck power steering kit that is so perfect and easy to
install, it almost doesn't seem logical that a truck this old can have
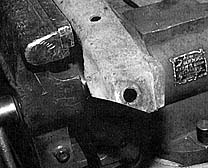
power steering so easily. The kit includes two custom-made mounting brackets
which attach on both sides of the driver's side front frame to locate the
GM Saginaw power steering gearbox in nearly an identical location as you
would find on a later model Chevy truck. The outer mounting bracket features
the required mounting holes with welded-on spacers to position the gearbox
in a straight line with the steering column. Also included in the Classic
Performance Products power steering kit are the required grade-eight hardware
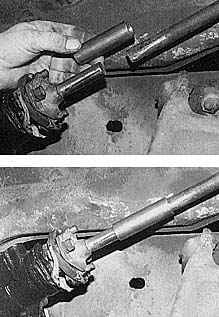
for mounting the brackets, and a steel sleeve that will connect the steering
column shaft back together after it has been shortened. A one-half inch
section of angle iron is also included to ensure that you have something
to make a straight line with.
|
Not included in this kit is the actual 1969-'87
2wd, half-ton Chevy truck gearbox, hoses and power steering pump. You are
required to provide these items while the kit allows you to install them
with ease. When choosing your power steering gearbox, make sure that it
is a 1969-'87 2wd half-ton truck model. Take note of exactly what year
box you have because in 1976, Chevy changed to metric fittings on all its
power steering units. This way you will. be able to get the proper power
steering hose kit from your local parts supplier. It is best to match up
the power steering pump to the model of box and hoses you have to make
the installation that much easier, You will also need to acquire a new
ragjoint or steering coupler. If you are getting a used gearbox, get the
ragjoint that was originally attached. If you are buying everything new,
then get a rag joint of the same year. For both the used or new joints,
it is very important that you keep the two mounting bolts that conned thejoint
to the steering shaft collar. These are shoulder bolts and they prevent
the installer from overtightening the ragjoint during assembly.
|
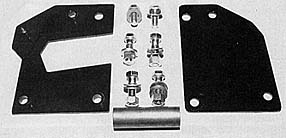
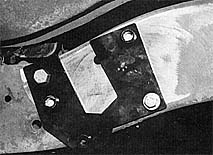
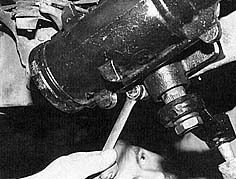
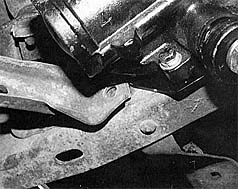
This is what the C.P.P. kit consists of. An outer frame
mounting bracket with the proper holes and gearbox spacers to line the
box up with the steering column. The other plate is to add more reinforcement
to the mounting system that is assembled with grade-eight hardware.
You must come up with the 1969-'87 2wd half-ton Chevy
truck power steering box and pitman arm, matching hose kit and power steering
pump. Take note of exactly what year box you have so that you can get the
same year hose kit and power steering pump from your local parts supplier.
In 1976, Chevy changed the gearbox fitting to metric.
|

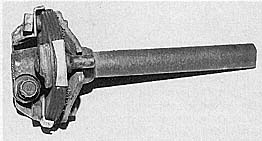
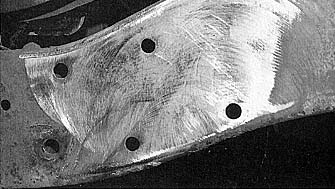
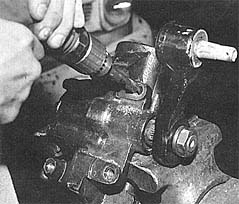
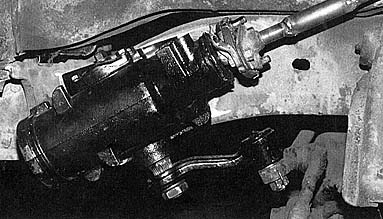
Aside from maybe the heavy accumulation of dirt and grease,
this is what your stock, manual steering assembly looks like.
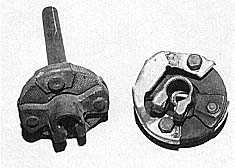
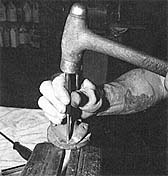
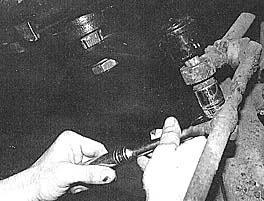
Obviously the first thing to do after you have properly
jacked the truck up and secured it with sturdy stands, is to remove the
old stock gearbox and pitman arm.
|
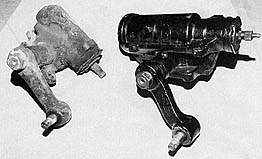
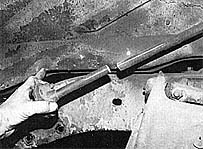
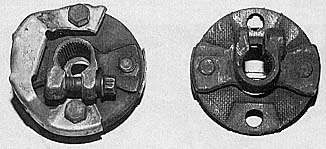
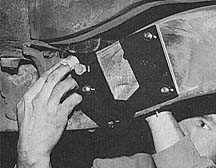
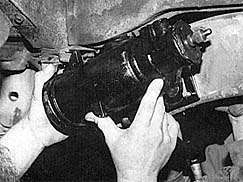
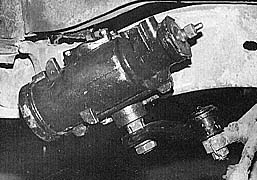
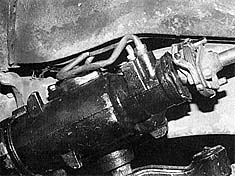
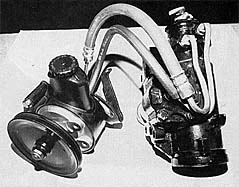
There is a dramatic size difference between the stock
manual and Saginaw power steering gearboxes. Make sure that you have the
right pitman arm to go with your box.
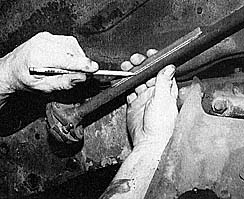
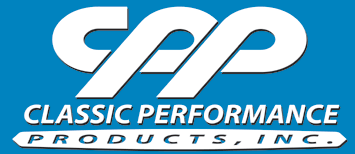
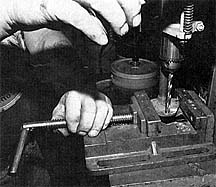
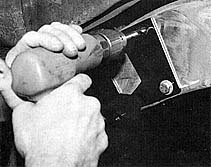
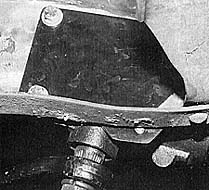
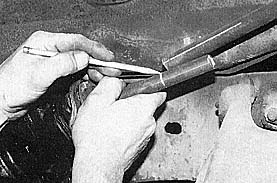
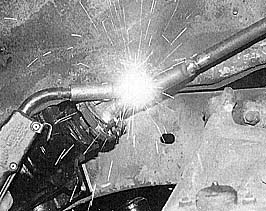
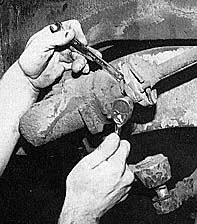
To make sure that you scribe a straight line, C.P.P.
has included a one-half-inch section of angle iron that is to be used to
make a line as shown. This will keep the correct timing of the shaft after
it is cut.
|
|
| Classic Performance Products 378 E Orangethorpe
Ave., Placentia CA 92870 Tech Line 714-522-2000 |
 |
TECH
| BOOKS | SUSPENSION
| BRAKES | STEERING | CONTACT
US | HOT PRODUCTS |

|
| © Classic Performance Products. This "website"
and all contents are property of Classic Performance Products.
Prices subject to change without notice. Not responsible for
errors or omissions. Please note that kits & prices
may vary between certain applications. |
|
|
|
|
|
|
|