Power Steering 1947-1959 Chevy and 1948-1956 Ford pickup
trucks
|
|
 |
|
- Classic Performance Products
- Adds Power Steering to your
- '47-'59 Chevy & GMC
- or
- '48-'56 Ford F-100Trucks
|
When it comes to upgrading a classic Chevy or Ford truck,
the options semm endless these days as aftermarket and restoration manufacturers
continue to provide trick enhancement products. Classic Performance Products
have become recognized leaders in the classic truck segments of customizing
and restoration, with innovations catering to a variety of applications,
all determined by the consumer's desires.
|
Largely enough, the installation of power steering has
become a major segment of classic truck upgrading. Classic Performance
Products offer a wide varity of options, depending on the application.
One of the hottest new offerings is a power steering kit that adapts to
the original straight axle design. The power steering kit provides the
flexability of retaining your stock steering column and gear box, as well
as the original suspension and brake assemblies.
|
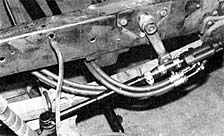
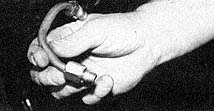
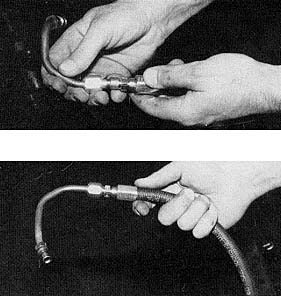
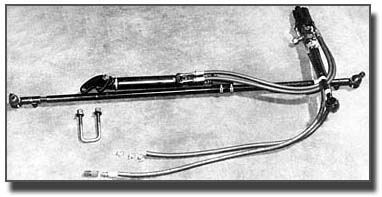
In this kit, you will find new drag link and tie rod
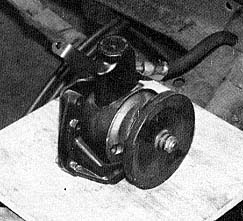
ends, control valve assembly and required hoses and compression fittings
with the owner needing only to acquire a power steering pump that works
with whatever engine your truck may have. In a nutshell, this new
power steering kit offers a lot to the restoration enthusiast or mild cutomizer
who chooses to retain the factory chassis and suspension design, but would
like the convenience of easier steering. It's simple to install and requires
no major modifcations to your stock equipment.
|
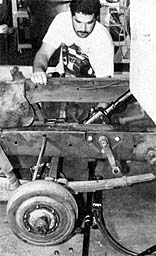
Although very basic compared to today's suspension chassis
designs, the stock 1947-'59 Chevy front suspension and steering assembly
remains a must for resto-fans. That's where this bolt-on power steering
kit comes in. To better show you the installation procedures, we are using
a bare chassis with the engine removed.
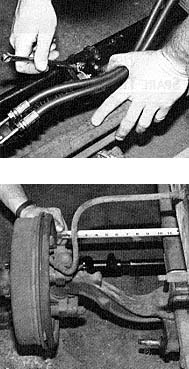
After properly jacking up the truck and supporting it
with sturdy stands, the first step is to remove the stock tie rods.
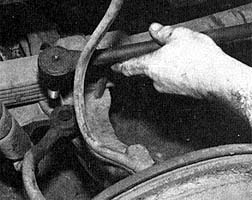
Next, remove the stock drag link that attaches to the
steering and pitman arms.
|

You then must remove the brake drums which allow access
to the steering arm bolts. Now remove the bolts and the steering arms.
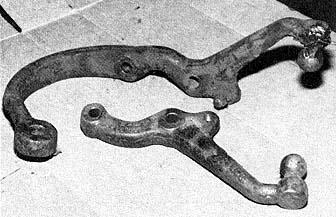
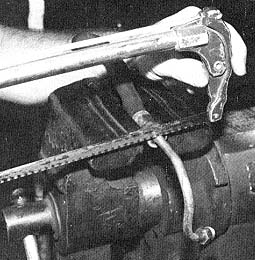
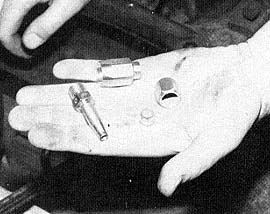
The stock ball ends must be removed to continue the installation.
|
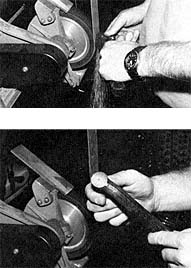
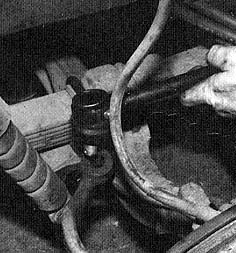
Using the belt sander, remove the pressed edge to the
point where you can slightly notice the outer circumference of the ball
joint.
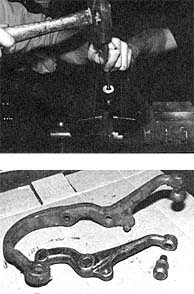
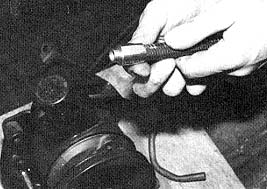
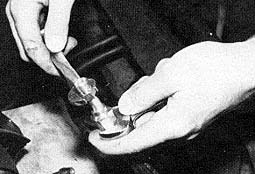
Use a center punch and hammer to knock out the ball end.
You may hace to drill it out if it doesn't want to cooperate. When complete,
re-install the steering arms back onto the backing plates of the truck.
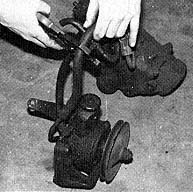
|
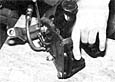
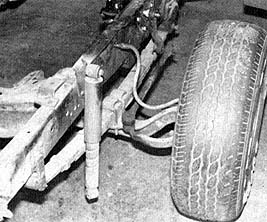
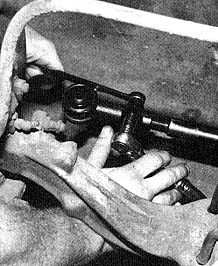
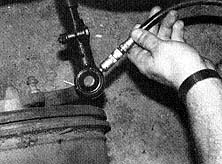
Now you can slide the complete power steering setup under
the truck, behind the axle.
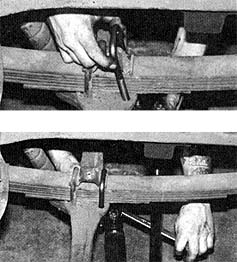
Attach the power cylinder bracket to the axle using the
supplied U-bolts and tighten.
|
After the bracket has been tightened, install a cotter
pin into the power cylinder attachment bolt.
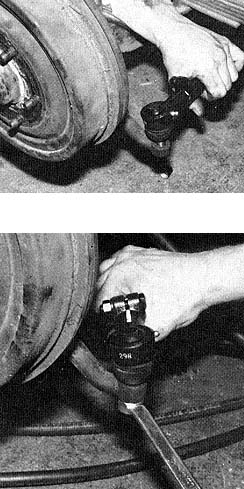
Install each new OEM upgrade one-inch tie rod ends onto
the top of the steering arms that you removed the ball ends from. Cotter
pins are to be installed here too.
|
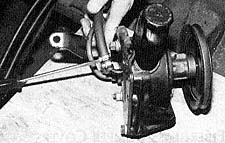
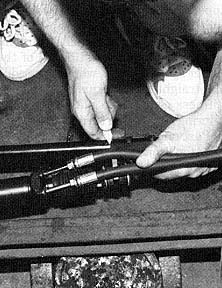
The new drag link extending from the control valve is
then installed onto the steering arm in the same manner as the stock drag
link. Once again, be sure to install the cotter pins.
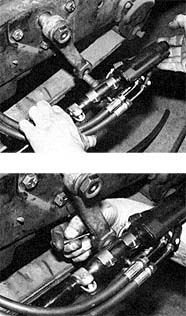
The new control valve simply installs right onto the
stock pitman arm in the same fashion as the tie rod ends and drag link.
|
| 
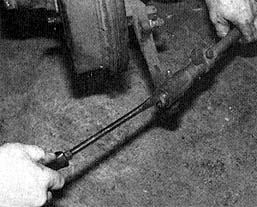
When you have gotten the alignment right, tighten the
tie rod end adjusters. With the cylinder clamp still loose, keep the wheels
pointing straight and extend the cylinder ram fully. Mark this point an
the tie rod at the inside point of the clamp.
Now, fully retract the ram and mark the position on the
tie rod from the same inside point of the clamp.
|
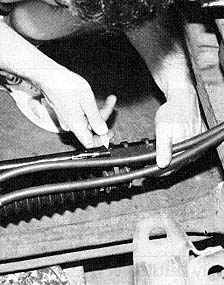
Measure between the two marks, which is seven inches
as shown. Find the center point of the distance, which in this case, measures
3-1/2-inches and mark.
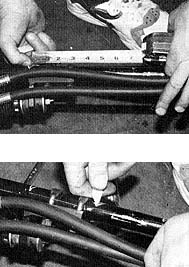
Now, set the inside of the clamp edge for which you used
to measure the distances at the center point you just marked and re-tighten.
This sets the power cylinder for equal operation while turning both directions.
|
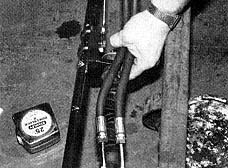
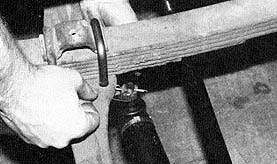
Using a grease gun, lube all zerk fittings on the assembly
(as well as your stock fittings while you're at it) to obtain the most
from this system.
Also, be sure to add power steering fluid before you
take off on a test cruise. If the left front wheel happens to rub the control
valve assembly at all, simply readjust the steering stops on the spindles.
|
|
| Classic Performance Products 378 E Orangethorpe
Ave., Placentia CA 92870 Tech Line 714-522-2000 |
 |
TECH
| BOOKS | SUSPENSION
| BRAKES | STEERING | CONTACT
US | HOT PRODUCTS |

|
| © Classic Performance Products. This "website"
and all contents are property of Classic Performance Products.
Prices subject to change without notice. Not responsible for
errors or omissions. Please note that kits & prices
may vary between certain applications. |
|
|
|
|
|
|
|