Classic Performance Products
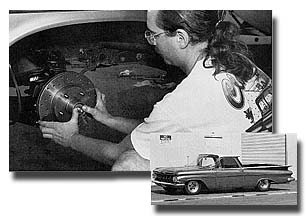
Drops and Stops a Classic El
Camino
|
| Part 1 Lowering the front end and installing disc
brakes. |
While there are many companies out there that supply
trick suspension hardware for enthusiasts of mid-fifties Fords and Chevys,
you might think that the classic El Camino owner has been forgotten. Wrong!
Classic Performance Products of Buena Park, California, can give the Elky
owner that down-in-the-dumps feeling and the reliable stopping power of
disc brakes with their two-inch lowered spindle and disc brake combination
kit. In addition, Classic Performance Products has the brake booster/master
cylinder to match.
|
For those who feel their Elkys could benefit from new
bushings, ball joints and tie rod ends, Classic also carries urethane bushings
that fit the stock sway bar Installing this hardware is the same for most
Chevy trucks. The fact that the control arms and cross shafts are designed
to fit one way is not unique, but it is best to note how they are constructed
before you disassemble them (a Polaroid camera works well), because this
will aid with re-assembly later. In part one, we will follow along as the
crew at Classic Performance disassembles
|
the front end and installs the new bushings and ball
joints, the drop spindle/disc brakes and the new coil
springs. Next month we will get into the disassembly of the rearend and
the installation of the tailing arm bushings, drop springs and Panhard
bar. With that done, the final step will be installing the booster/master
cylinder and brake line kit. These kits, whether used together or individually,
are a must for the classic El Camino owner, especially those who want the
added safety factor provided by the disc brake kit.
|
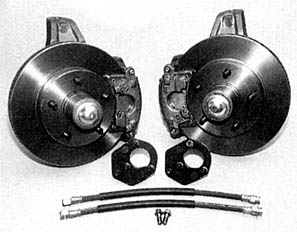
The disc brake/drop spindle kit for Classic Performance
comes with adapters and brake lines.
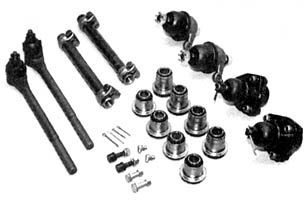
All the bushings, ball joints and tie rod ends come straight
from the Classic Performance catalog.
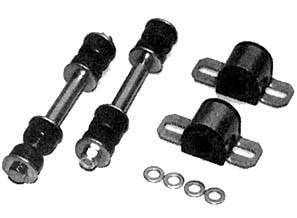
Classic also carries the urethane bushings for the stock
sway bar.
|
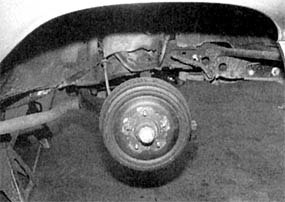
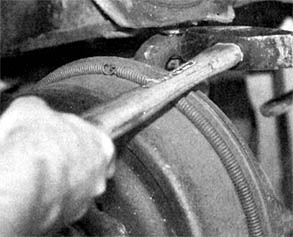
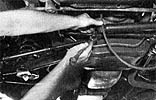
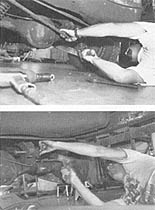
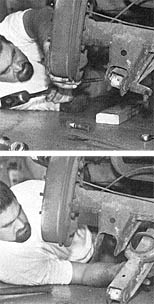
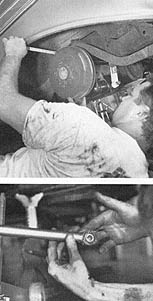
With the truck sitting securely on jack stands, the shocks
and brake lines have been disconnected and removed. The tie rod ends have
also been disconnected.
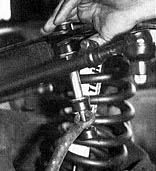
A floor jack has been placed under the lower arm and
raised enough so there is slight pressure on the spring. The nuts on the
ball joints are loosened to the last few threads but not removed.
|
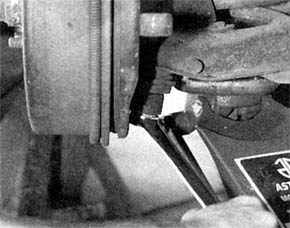
The lower nut is removed and the floor jack is lowered
just enough to remove the spindle from the lower ball
joint. Do not lower the floor jack too much at this point, or you might
eat the spring. Remove the upper nut and then the spindle. The only piece
that will be re-used is the steering arm, which is bolted to the spindle. It will be removed, cleaned and inspected before
going back on the new drop spindles.
With the jack lowered slightly to take pressure off the
spring, a few sharp blows to the spindle are usually all that is required
to separate the spindle from the ball joints.
|
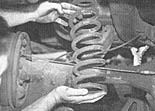
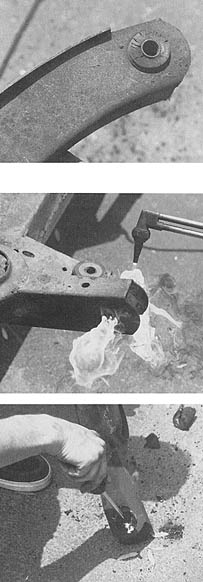
With the spindle removed, gently lower the floor jack
and remove the spring.
There
is a definite "front and back" and "side to side" when
it comes to the upper and lower arms on the El Camino, so note the location
prior to removing them. Better yet, take a Polaroid of the setup before
you disassemble it. 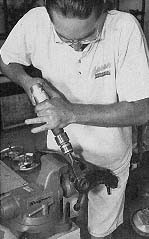
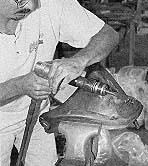
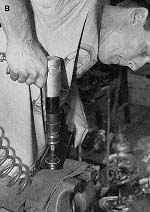
An air chisel is used to remove
the pressed-in bushings, but the old fashioned hammer and chisel will also
work. These shells are not going to be re-used, so it is not necessary
to be too careful with them. However, be careful not to damage the cross
shaft.
|
|
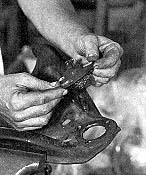
If
the ball joints on the upper arm are riveted in place, it means they are
stock. The chisel is used to remove the heads, and a grinder and a punch
will drive out the rest of the rivet. 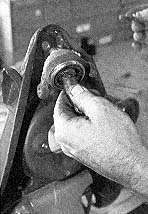
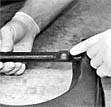
The process of stripping the
lower arm is the same as that for the upper, except that the ball joint
is bolted in. Once the arms are stripped, they will be sandblasted and
checked for cracks or other damage before being painted and readied for
the new parts.
|
|
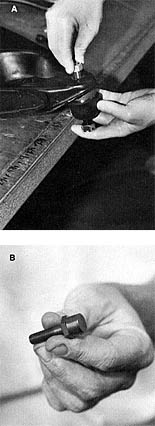
Installing the new bushings is fairly straight-forward.
(A) They are first disassembled, and then the shells are heavily greased.
(8) They are then driven in with a bushing attachment on the air hammer.
A socket and hammer will work, but the shell has to be completely seated
in the arm.
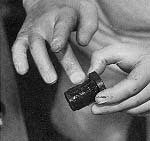
The
insert is made of a poly graphite, so it must be greased with the supplied
silicone-based lubricant. It is inserted into the shell along with the
inner sleeve.
|
|
|
|
|
|
|
|
|
|
|
|
|
|
|
|
|
|
|
|
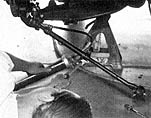
When installing the cross shaft in the lower control
arm, be sure it is facing the correct way. There is definitely a right
and wrong way to install it. The cross shaft has a flat side that
must be installed against the frame; the two mounting holes
go to the front.
(A) The ball joint is installed with two side bolts and
a nut on the main shaft. (B) One of the bolts acts
as a steering stop, and it goes to the rear of the arm. A new polyurethane
bump stop replaced the old rubber unit, so it was necessary to drill an
additional hole in the arm.
|
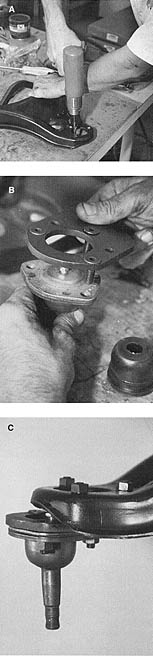
Now to the upper control arm. The cross shaft and bushings
have already been installed, so the next step is to install the upper ball
joint adapter. (A) The stock holes are drilled
out and (B) the adapter is bolted in place. (C) The
adapter is necessary to properly align the caster.
|

With that, it is simply a matter of bolting the arms
back up to the truck.
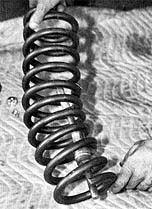
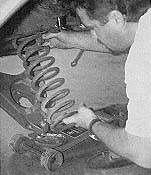
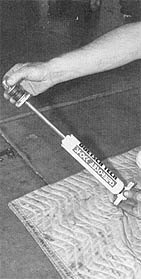
It is necessary to collapse the coil spring using a spring
compressor tool before you can install it.
The spring is set in place and the arm is raised slightly
using the floor jack. The spring tool is removed through the shock hole.
|
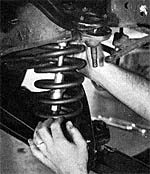
The spindle is placed on the lower ball joint, and the
nut is threaded onto the first few threads. (A) The
floor jack is then raised, the top of the spindle is set in place, and
the nut is applied. (B) The nuts are then tightened down.
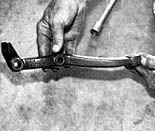
The stock steering arm, which has been cleaned and inspected,
is bolted onto the spindle.
|
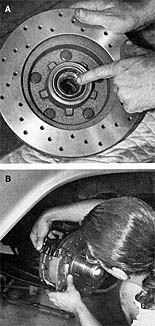
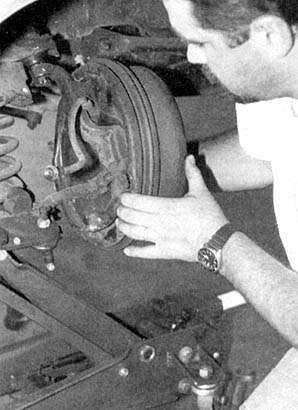
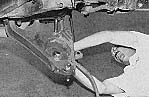
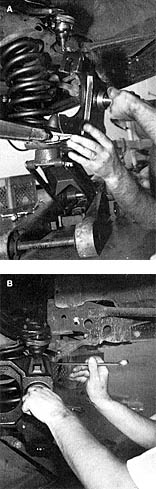
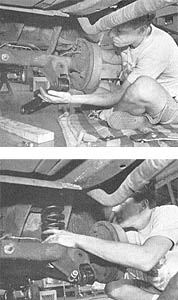
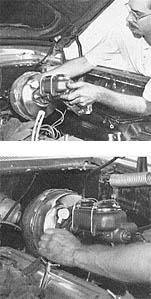
With the spindle in place, (A) the wheel bearings in
the rotor are greased up, (B) and the rotor and caliper
are installed on the spindle.

The adjustable Doetsch Tech shocks are set on the firmest
setting and then installed.
|
Now is the time to fully grease the ball joints and tie
rod ends.
New tie rods are also part of this rebuild/upgrade
and are bolted in place.
Because the Chevy had a stock sway bar, the old rubber
bushings were replaced with new urethane bushings.
|
|
Part 2 Lowering the rear end |
Part two will concentrate on refurbishing the rear suspension
and installing one of Classic's adjustable Panhard bars, as well as their
lowered springs, new bushings and a set of Doetsch Tech shocks. And last
but certainly not least, the addition of the front disc brakes required
that a new power assisted master cylinder be added. The stock unit
was a single reservoir design that had a hard time with the stock drums,
let alone the new discs.
|
Classic also carries pre-bent stainless steel brake
lines for a variety of vehicles, so naturally a kit was installed too. While there are not as many pieces to remove and replace as with
the front end, disassembling the back half of this project possesses a
few quirks of its own. For instance, the rear suspension on the '59 Elky
is a 3-link configuration. A what, you ask? You've heard of 4-link, and
trailing arms such as on later Chevy trucks, but what is a 3-link?
|
Well, this suspension consists of short trailing arms,
and a single upper arm that is connected to the right of the pumpkin, and
runs to a frame mount lust below the bed. The Chevy also came stock with
a non-adiustable Panhard bar (which was bent), so the rearend was hooked
up, it's just a little different than the usual.
Classic Performance Products has a complete line of parts for your classic
Elky, so for more information on these or other products that Classic Perfor-
mance sells, give them a call at (800) 522-5004 or (714)
522-2000.
|
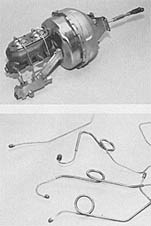
Classic offers this power booster/master cylinder that
is designed to work with the front disc brakes installed in part 1 above.
Also available are stainless steel brake lines that are pre bent and ready
to install.
With the truck securely up on jack stands, the dismantling
began. The Panhard bar is removed and the upper link will be next. The
floor jack was used to take pressure off, but a punch was still needed
to remove the bolts.
By gently lowering the jack, the springs are easily removed.
|
The lower shock mount also acts
as the lower trailing arm mount. Again, a punch may be needed to dislodge the assembly.

In their infinite wisdom, Chevrolet
decided to use two styles of bushings on the trailing
arms. One style is the standard shell type, and the
other is vulcanized to the arm. The
shell type is removed in the same fashion
as the front a-arm bushings were: drive out the center sleeve
and use an air chisel to drive out the shell.
|
The vulcanized type is a little more difficult to remove.
A welder's torch is used to heat the rubber bushing,
which can then be pushed out with a screwdriver. One
thing to be aware of is the odd fact that when the
torch is heating the rubber, the metal inner sleeve will launch out of
the bushing with surprising force, so be careful with your legs and feet.
This is also a job to be done outside, or your garage will smell really
bad.
|
After that it is simply a matter of re-assembling the
components. The use of Loctite is recommended.
|
A pair of adjustable Doetsch Tech shocks
are set on their firmest setting and then installed.
|
When installing the Panhard bar, careful measurements
are taken to ensure the rearend is centered. The bushings are also well
greased.
|
Classic Performance installed this new power booster/master
cylinder that comes complete with the correct valveing
mated to the demands of the new disc brake system. Vacuum
was taken from the center carb. This is not an option as the stock single
chamber master cylinder was barely able to stop the truck
when it had drum brakes, but will have no chance with the new front discs
in place.
|
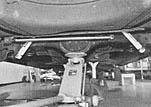
The completed job.
|
xxxxxxxxxxxxxxxxxxxxxxxx |
|
| Classic Performance Products 378 E Orangethorpe
Ave., Placentia CA 92870 Tech Line 714-522-2000 |
 |
TECH
| BOOKS | SUSPENSION
| BRAKES | STEERING | CONTACT
US | HOT PRODUCTS |

|
| © Classic Performance Products. This "website"
and all contents are property of Classic Performance Products.
Prices subject to change without notice. Not responsible for
errors or omissions. Please note that kits & prices
may vary between certain applications. |
|
|
|
|
|
|
|