- Classic Performance Products
- Stop your classic more efficiently
- with disc brakes that mate
with your stock suspension.
- For 1947-'59 Chevy/GMC trucks.
-
- * Important note: This
kit was manufactured to be used with 1971-1976 Camaro rotors and calipers. (or
a GM equivalent)
-
- By Brian McCormick
|
Are you tired of having one leg that is all pumped up
and quite larger than the other because of the antique manual drum brakes
on your 1947-'59 Chevy truck? Do you sometimes feel as though you are wrestling
a bull when trying to stop at an intersection? Oh yes, the thrills of driving
a classic truck are quite intriguing to say the least. But, you don't have
to put up with prehistoric technology to drive a classic hauler; instead,
slap on a better braking system. Classic Performance Products have
stepped-up to bat for 1947-'59 Chevy truck fans with an all-new disc brake
kit that relieves you of stressful driving
|
and brings back safety and assurance. That's right, both
Classic Performance Products are taking classic truckin' to a new level
by producing upgrading innovations for classic Chevy enthusiasts who are
looking to keep their truck along stock boundaries. The disc brake
kit comes with a pair of custom made caliper brackets, bearings and cups,
and all the mounting hardware you need. The 1971 and up Chevy rotors and
calipers are not included in the package, but a quick trip to the parts
yard or local auto parts store will surely provide you with these items.
The real truth to this updated brake design is that it's designed to work
with
|
your stock straight axle suspension, a must for nostalgia
buffs. Of course, you will have to swap front wheels since the stock drum
pattern is six-lug and the new disc pattern is 5-lug. And, let us not forget
to mention your options of manual or power brakes, Both are fine, it simply
depends on the application of choice and the engine you have. Classic Performance
Products both offer a wide variety of power brake setups that mount on
the frame, out of sight, and provide a great measure of convenience. If
you do wish to upgrade to a power system, be sure to mention what kind
of system you desire for your particular application. Now let's go through
the basic installation steps.
|
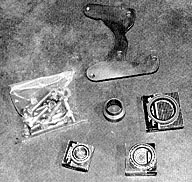
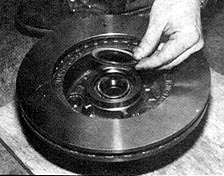
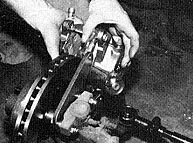
The Classic Performance Products disc brake conversion
kit includes new bearings and bearing cups, two caliper brackets and all
necessary mounting hardware.

All in all, this is what it takes to complete one side.
Remember, you have to dig up rotors and calipers.
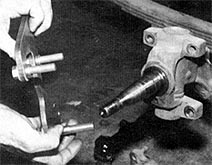
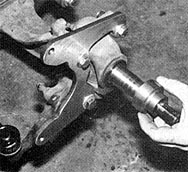
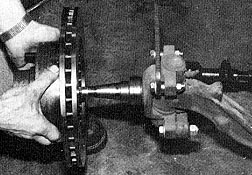
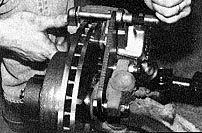
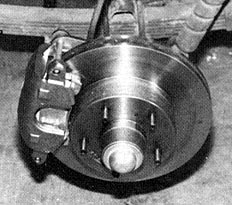
1. To begin, the truck must be properly jacked-up and
supported. As you can see, we are using a truck that has shed its front
sheet metal and engine to better show you how to perform this installation.
|
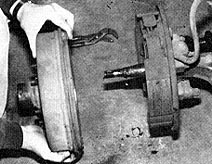
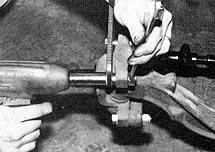
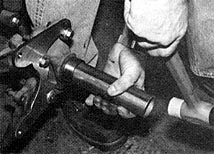
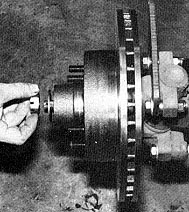
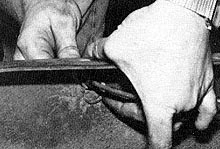
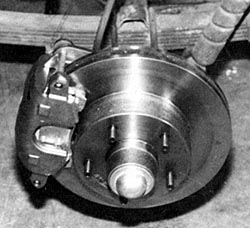
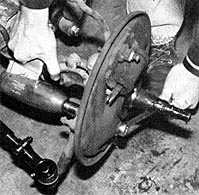
2. The next step is to remove the brake drums.

3. After removing the return spring, the entire brake
pad assembly can be taken off.
|
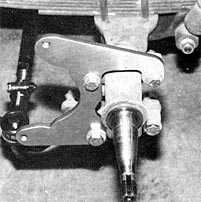
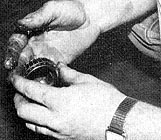
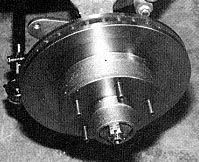
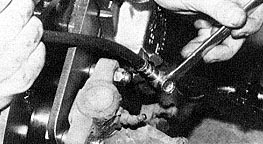
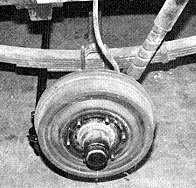
4. Now remove the bolts holding the backing plate to
the spindle.
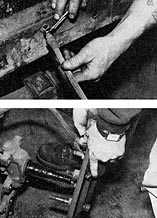
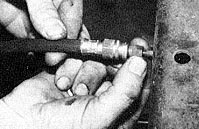
5. The stock brake hose that attached to the hard lines
on the frame must be unbolted so that the backing plate can be removed.
|
|
| Classic Performance Products 378 E Orangethorpe
Ave., Placentia CA 92870 Tech Line 714-522-2000 |
 |
TECH
| BOOKS | SUSPENSION
| BRAKES | STEERING | CONTACT
US | HOT PRODUCTS |

|
| © Classic Performance Products. This "website"
and all contents are property of Classic Performance Products.
Prices subject to change without notice. Not responsible for
errors or omissions. Please note that kits & prices
may vary between certain applications. |
|
|
|
|
|
|
|