| |
Front Disc Brake Conversion Kit
Installation Instructions
Read these instructions completely before attempting this installation!!!
Make sure this kit fits your application before painting or plating.
Parts that have been painted, plated or modified may not be returned.
- Raise vehicle and support it with jackstands. Remove the wheels.
- Remove stock spindle assemblies.
- Inspect all ball joints and tie rod ends for wear. If any parts are
worn out, replace them. Replacement parts are available from Classic Performance.
Please call for pricing.
- Remove steering arms from the stock spindle assemblies and install
them on the new spindle assemblies according to the attached diagram using
the supplied hardware. The rotor and caliper will need to be removed in
order to tighten down the steering arm. On some applications it may be
necessary to drill steering arm and spindle mounting holes out to 1/2"
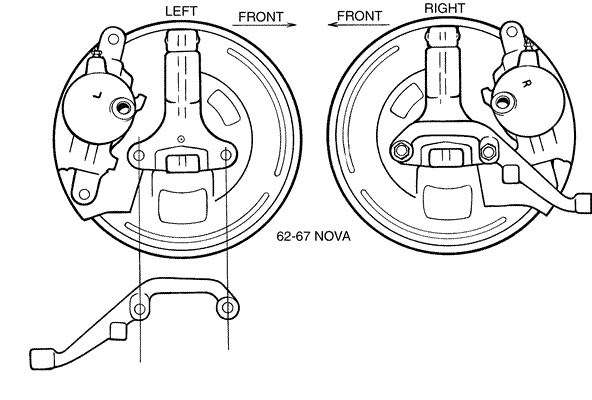
ID. Note: 62-63 4-lug Nova’s need the steering arms from a 64-67 5-lug
Nova. Call for price and availability.
- After the steering arm has been installed, re-install the rotor and
caliper on the spindle. Install provided spindle nut. Torque down 12ft.-lbs..
While turning rotor, loosen spindle nut one flat. Install cotter pin and
dust cap.
- Install the new spindle assemblies. Torque lower ball joint to 65ft.-lbs.,
upper ball joint to 50ft.-lbs. and tie rod end to 35ft.-lbs.. Be sure to
use supplied cotter pins where needed.
- Make sure everything is good and tight and proceed to bleed your brake
system.
Diagram A:
Spindle nut being installed |
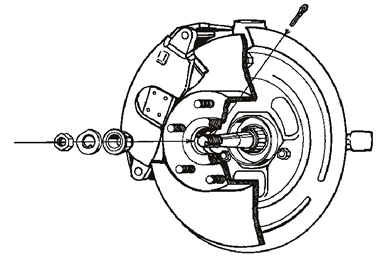 |
Diagram B:
64-72 Chevelle steering arm installation. |
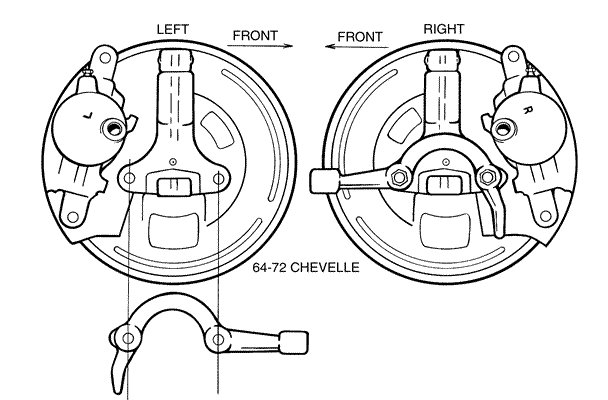 |
Diagram C:
67-69 Camaro and 68-74 Nova steering arm installation. |
 |
Diagram D:
62-67 Nova steering arm installation.
62-63 4-lug Nova’s must use steering arms from 64-67 5-lug Nova’s.
Call for availability. |
 |
|
|

